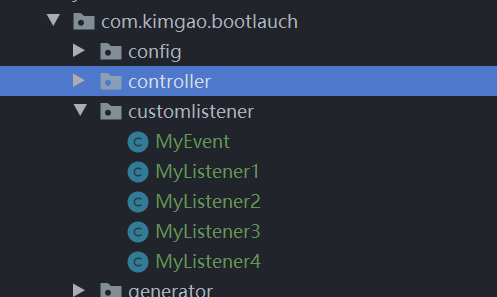
## 一、概述:
**自定义事件和自定义监听器类的实现方式**
自定义事件:继承自ApplicationEvent抽象类,然后定义自己的构造器
自定义监听:实现ApplicationListener接口,然后实现onApplicationEvent方法
**springboot进行事件监听有四种方式**
1.手工向ApplicationContext中添加监听器
2.将监听器装载入spring容器
3.在application.properties中配置监听器
4.通过@EventListener注解实现事件监听
## 二、代码实现
下面讲下4种事件监听的具体实现
### 方式1.
首先创建MyListener1类
~~~
@Slf4j
public class MyListener1 implements ApplicationListener<MyEvent> {
public void onApplicationEvent(MyEvent event) {
log.info(String.format("%s监听到事件源:%s.", MyListener1.class.getName(), event.getSource()));
}
}
~~~
然后在springboot应用启动类中获取ConfigurableApplicationContext上下文,装载监听
~~~
@SpringBootApplication
public class BootLaunchApplication {
public static void main(String[] args) {
ConfigurableApplicationContext context = SpringApplication.run(BootLaunchApplication.class, args);
//装载监听
context.addApplicationListener(new MyListener1());
}
}
~~~
### 方式2(推荐).
创建MyListener2类,并使用@Component注解将该类装载入spring容器中
~~~
@Component
@Slf4j
public class MyListener2 implements ApplicationListener<MyEvent> {
public void onApplicationEvent(MyEvent event) {
log.info(String.format("%s监听到事件源:%s.", MyListener2.class.getName(), event.getSource()));
}
}
~~~
### 方式3.
首先创建MyListener3类
~~~
@Slf4j
public class MyListener3 implements ApplicationListener<MyEvent> {
public void onApplicationEvent(MyEvent event) {
log.info(String.format("%s监听到事件源:%s.", MyListener3.class.getName(), event.getSource()));
}
}
~~~
然后在application.properties中配置监听,**注意修改路径为自己项目路径否则无法启动**
~~~
context:
listener:
classes: com.kimgao.bootlauch.customlistener.MyListener3
~~~
### 方式4(推荐).
创建MyListener4类,该类无需实现ApplicationListener接口,使用@EventListener装饰具体方法
~~~
@Slf4j
@Component
public class MyListener4 {
@EventListener
public void listener(MyEvent event) {
log.info(String.format("%s监听到事件源:%s.", MyListener4.class.getName(), event.getSource()));
}
}
~~~
自定义事件代码如下:
~~~
@SuppressWarnings("serial")
public class MyEvent extends ApplicationEvent
{
public MyEvent(Object source)
{
super(source);
}
}
~~~

## 三、测试监听事件发布
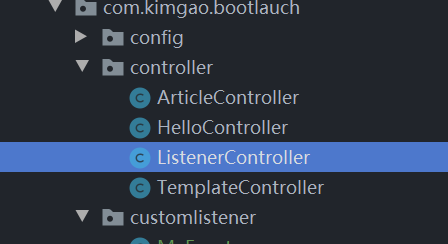
有了applicationContext,想在哪发布事件就在哪发布事件
~~~
@RestController
public class ListenerController {
@Resource
ConfigurableApplicationContext applicationContext;
@RequestMapping("/publish")
public String hello() {
applicationContext.publishEvent(new MyEvent("邮件内容"));
return "OK";
}
}
~~~

启动后,日志打印如下。(下面截图是在启动类发布事件后的截图,在单元测试里面监听器1监听不到,执行顺序问题):

由日志打印可以看出,SpringBoot四种事件的实现方式监听是有序的。无论执行多少次都是这个顺序。
- 内容简介
- 第一章 Spring boot 简介
- 1.1 helloworld
- 1.2 提高开发效率工具lombok
- 1.3 IDEA热部署
- 1.4 IDEA常用插件
- 1.5 常用注解
- 第二章 RESTful接口
- 2.1 RESTful风格API
- 2.1.1 spring常用注解开发RESTful接口
- 2.1.2 HTTP协议与Spring参数接收注解
- 2.1.3 Spring请求处理流程注解
- 2.2 JSON数据格式处理
- 2.2.1 Jackson的转换示例代码
- 2.3 针对接口编写测试代码
- 2.3.1 编码接口测试示例代码
- 2.3.2 带severlet容器的接口测试示例代码
- 2.3.3 Mockito测试示例代码
- 2.3.4 Mockito轻量测试
- 2.4 使用swagger2构建API文档
- 2.4.1 swagger2示例代码
- 2.4.2 pom.xml
- 2.5 使用swagger2导出各种格式的接口文档
- 第三章 sping boot配置管理
- 3.1 YAML语法
- 3.2 YAML绑定配置变量的方式
- 3.3 YAML配置属性值校验
- 3.4 YAML加载外部配置文件
- 3.5 SpEL表达式绑定配置项
- 3.6 不同环境下的多配置
- 3.7 配置文件的优先级
- 3.8 配置文件敏感字段加密
- 第四章 连接数据库使用到的框架
- 4.1 spring JDBC
- 4.2 mybatis配置mybatisgenerator自动生成代码
- 4.3 mybatis操作数据库+dozer整合Bean自动加载
- 4.4 spring boot mybatis 规范
- 4.5 spirng 事务与分布式事务
- 4.6 spring mybaits 多数据源(未在git版本中实现)
- 4.7 mybatis+atomikos实现分布式事务(未在git版本中实现)
- 4.8 mybatis踩坑之逆向工程导致的服务无法启动
- 4.9 Mybatis Plus
- 4.9.1.CURD快速入门
- 4.9.2.条件构造器使用与总结
- 4.9.3.自定义SQL
- 4.9.4.表格分页与下拉分页查询
- 4.9.5.ActiveRecord模式
- 4.9.6.主键生成策略
- 4.9.7.MybatisPlus代码生成器
- 4.9.8.逻辑删除
- 4.9.9.字段自动填充
- 4.9.10.多租户解决方案
- 4.9.11.雪花算法与精度丢失
- 第五章 页面展现整合
- 5.1 webjars与静态资源
- 5.2 模板引擎与未来趋势
- 5.3 整合JSP
- 5.4 整合Freemarker
- 5.5 整合Thymeleaf
- 5.6 Thymeleaf基础语法
- 5.7 Thymeleaf内置对象与工具类
- 5.8 Thymeleaf公共片段(标签)和内联JS
- 第六章 生命周期内的拦截、监听
- 6.1 servlet与filter与listener的实现
- 6.1.1 FilterRegistration
- 6.1.2 CustomFilter
- 6.1.3 Customlister
- 6.1.4 FirstServlet
- 6.2 spring拦截器及请求链路说明
- 6.2.1 MyWebMvcConfigurer
- 6.2.2 CustomHandlerInterceptor
- 6.3 自定义事件的发布与监听
- 6.4 应用启动的监听
- 第七章 嵌入式容器的配置与应用
- 7.1 嵌入式的容器配置与调整
- 7.2 切换到jetty&undertow容器
- 7.3 打war包部署到外置tomcat容器
- 第八章 统一全局异常处理
- 8.1 设计一个优秀的异常处理机制
- 8.2 自定义异常和相关数据结构
- 8.3 全局异常处理ExceptionHandler
- 8.3.1 HelloController
- 8.4 服务端数据校验与全局异常处理
- 8.5 AOP实现完美异常处理方案
- 第九章 日志框架与全局日志管理
- 9.1 日志框架的简介与选型
- 9.2 logback日志框架整合使用
- 9.3 log4j2日志框架整合与使用
- 9.4 拦截器实现用户统一访问日志
- 第十章 异步任务与定时任务
- 10.1 实现Async异步任务
- 10.2 为异步任务规划线程池
- 10.3 通过@Scheduled实现定时任务
- 10.4 quartz简单定时任务(内存持久化)
- 10.5 quartz动态定时任务(数据库持久化)
- 番外章节
- 1.windows下安装git
- 1 git的使用
- 2 idea通过git上传代码到github
- 2.maven配置
- 3.idea几个辅助插件
- 4.idea配置数据库
- 5.搭建外网穿透实现外网访问内网项目
- 6.idea设置修改页面自动刷新
- 7.本地tomcat启动乱码
- 8.win10桌面整理,得到一个整洁的桌面
- 9.//TODO的用法
- 10.navicat for mysql 工具激活
- 11.安装redis
- 12.idea修改内存
- 13.IDEA svn配置
- 14.IntelliJ IDEA像Eclipse一样打开多个项目
