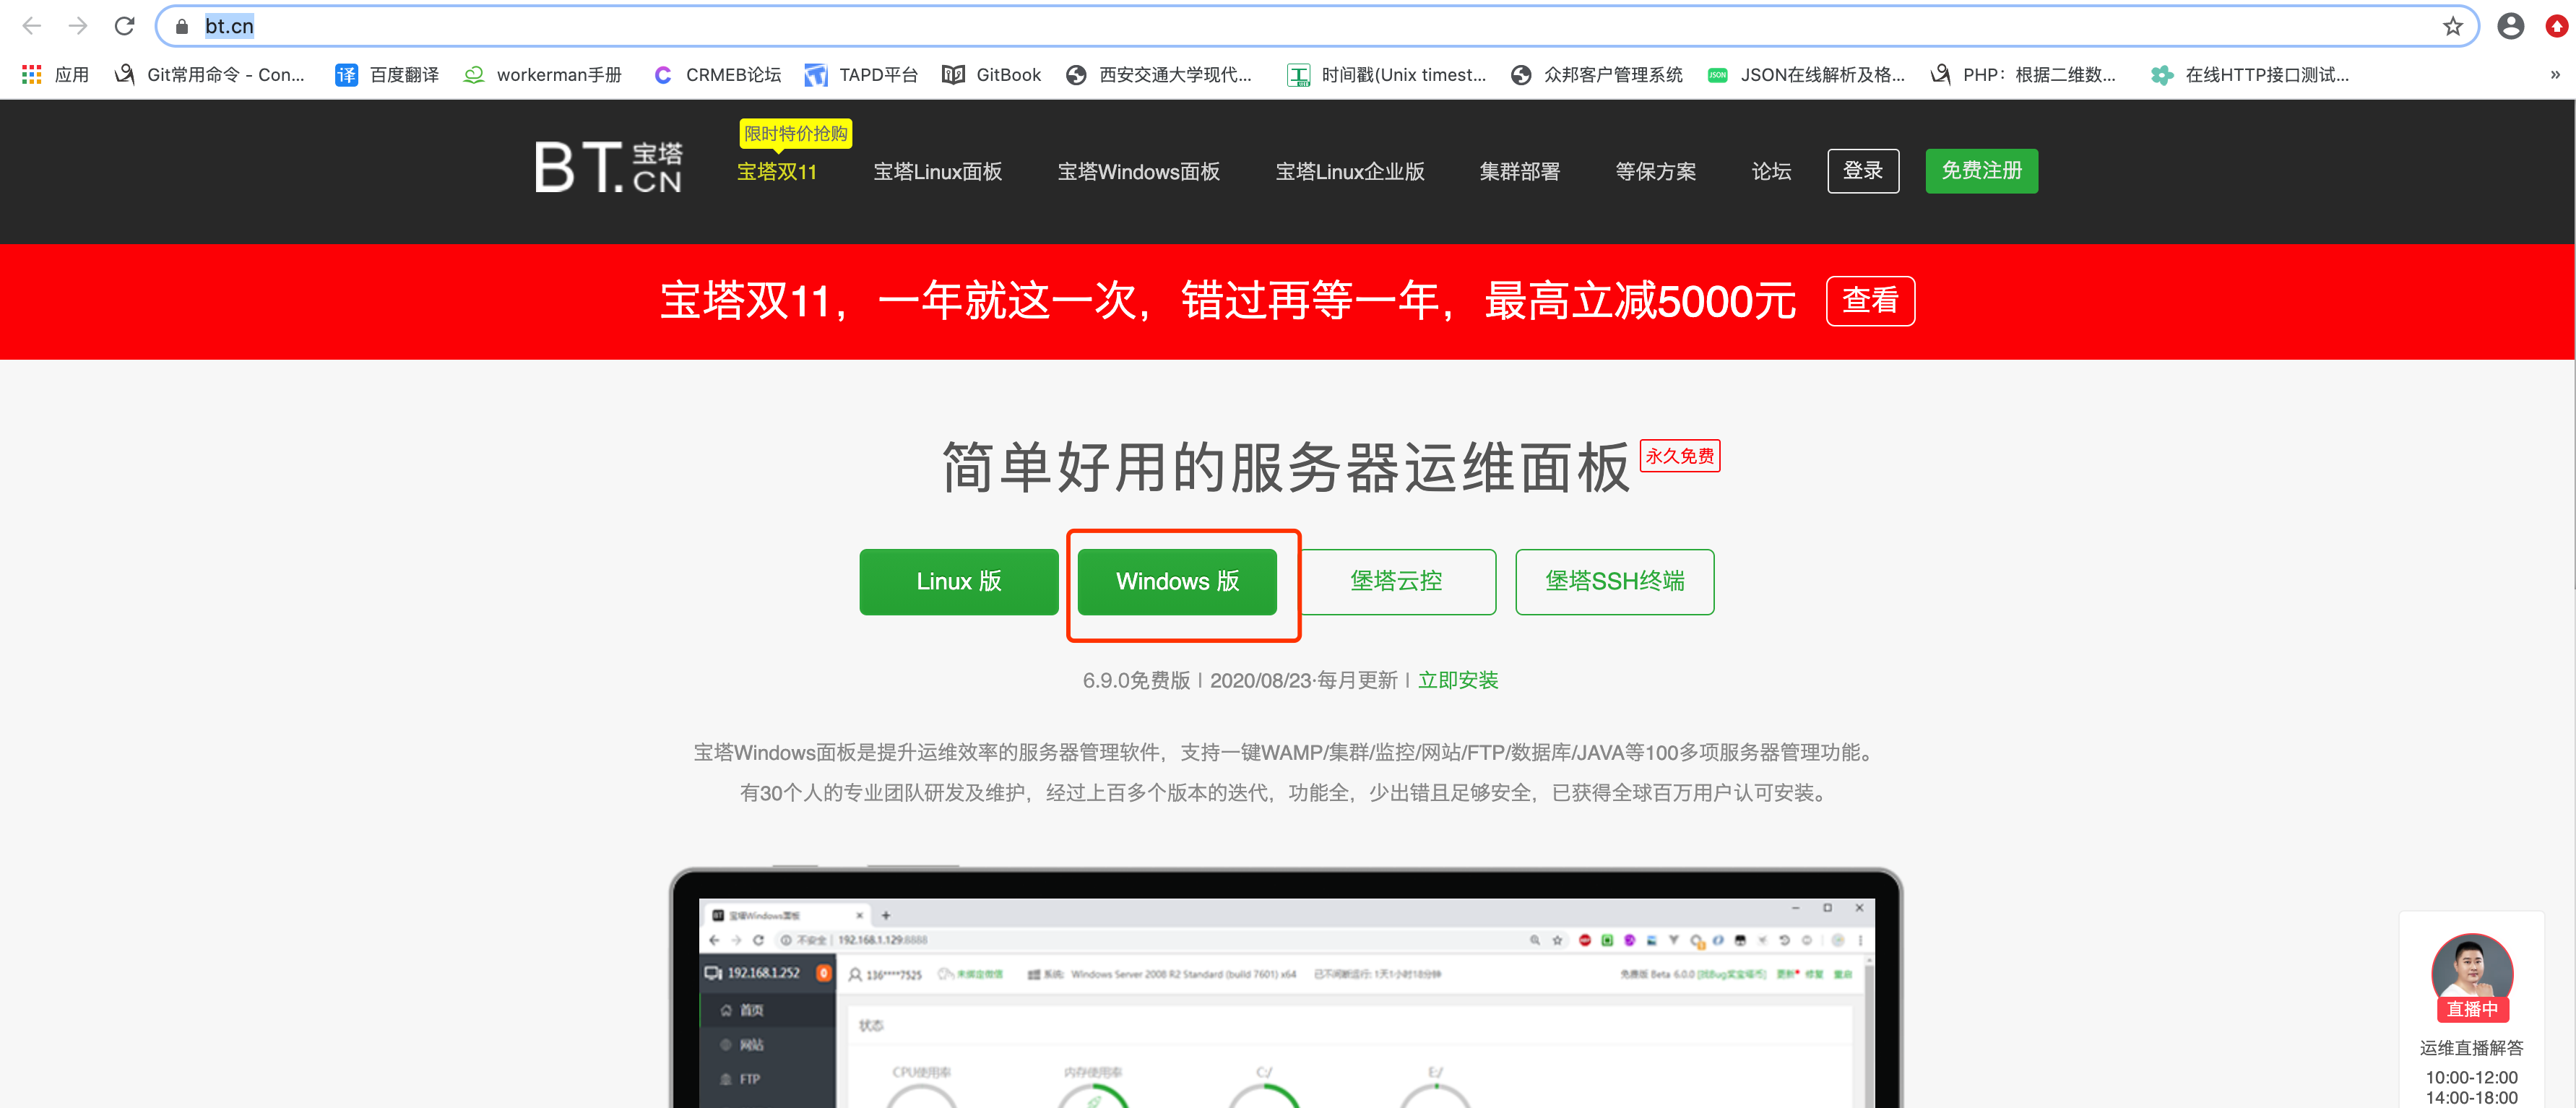
1.下载windows版本宝塔[宝塔](https://www.bt.cn/)
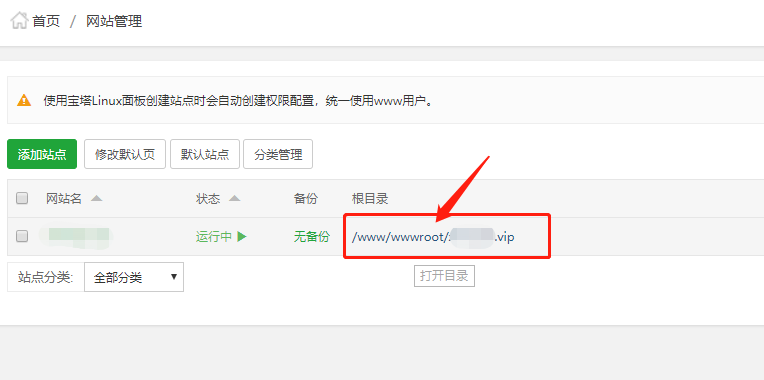
2.进入宝塔面板,选择左侧**网站**

3.点击上一步中新建的站点**根目录**,进入系统
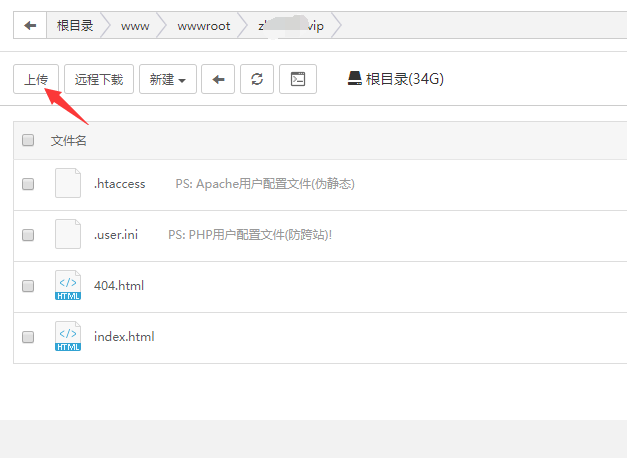
4.点击左上角**上传**
5.点击**添加文件**,*选择本地电脑CRMEB -知识付费源码压缩包*,然后点击**开始上传**
6.等待**上传完成**,关闭对话框
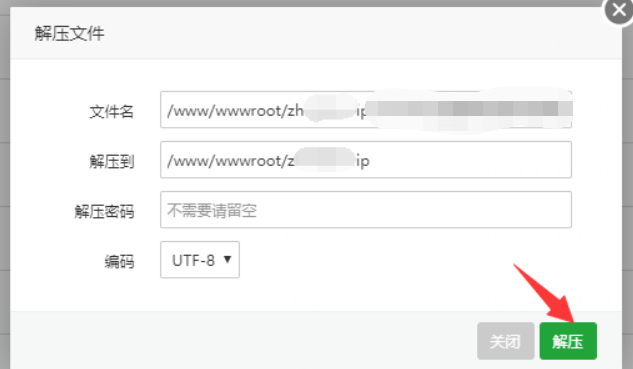
7.**解压**CRMEB-知识付费源码压缩包
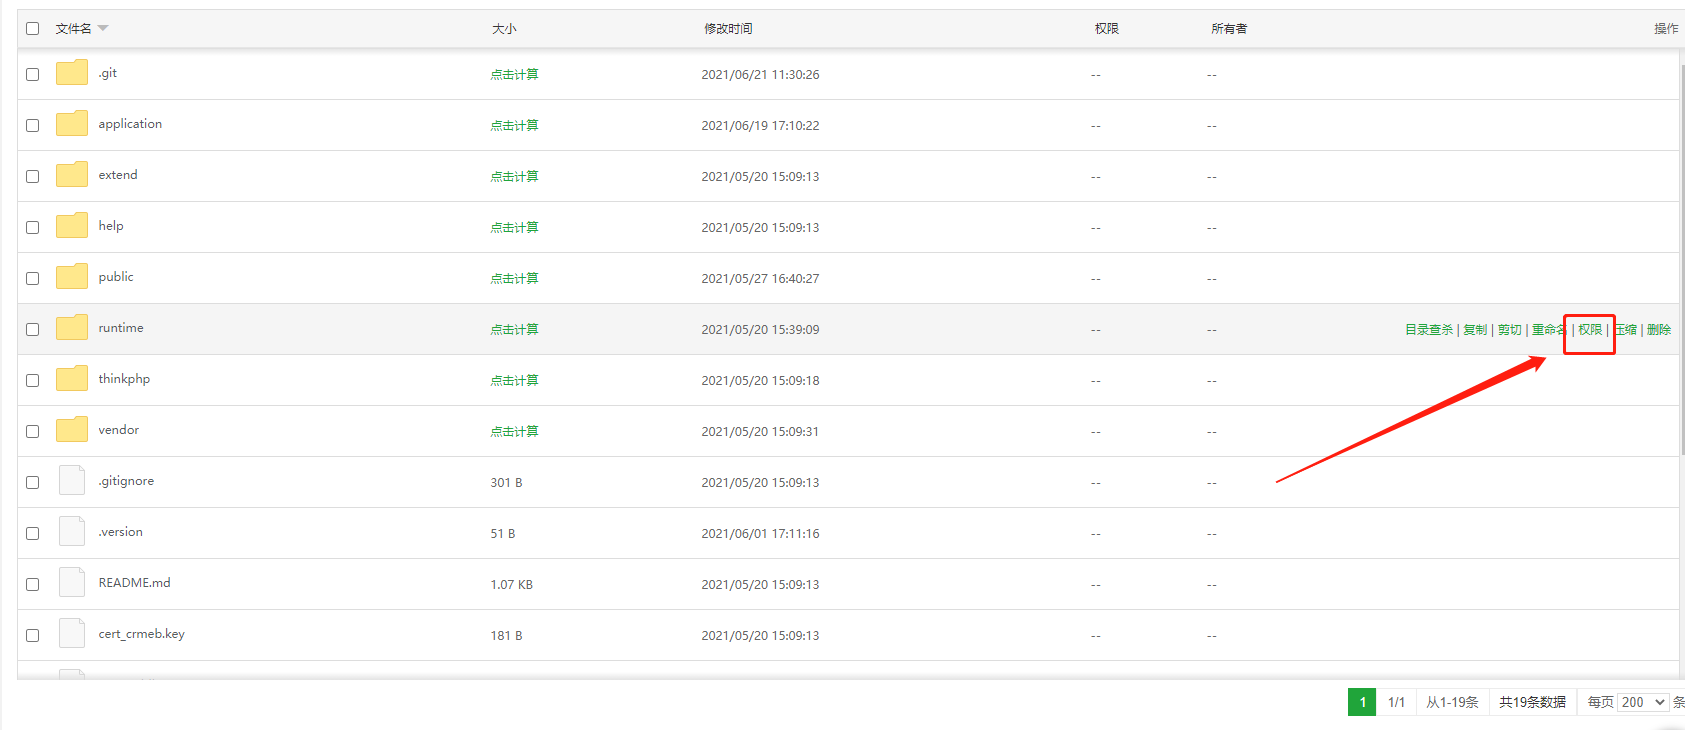
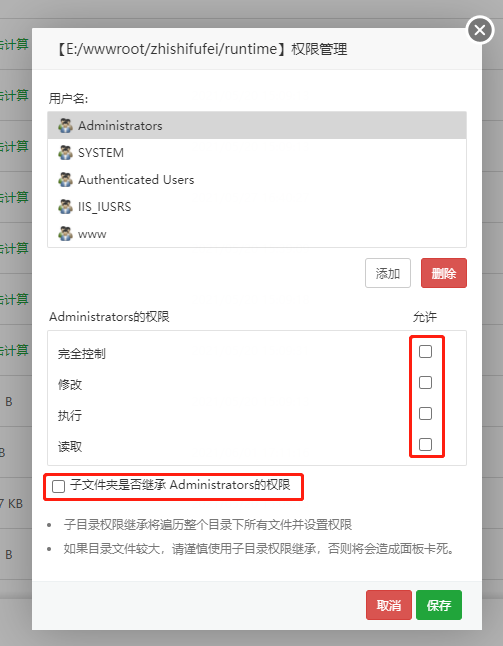
修改目录权限:777
/public
/runtime (缓存文件在系统运行后生成)
修改文件夹
### **8\. 宝塔环境安装 swoole-loader** (**开源版本忽略此步骤**)
***注:请使用知识付费系统里help里的swoole-loader文件;不要在官方下载***
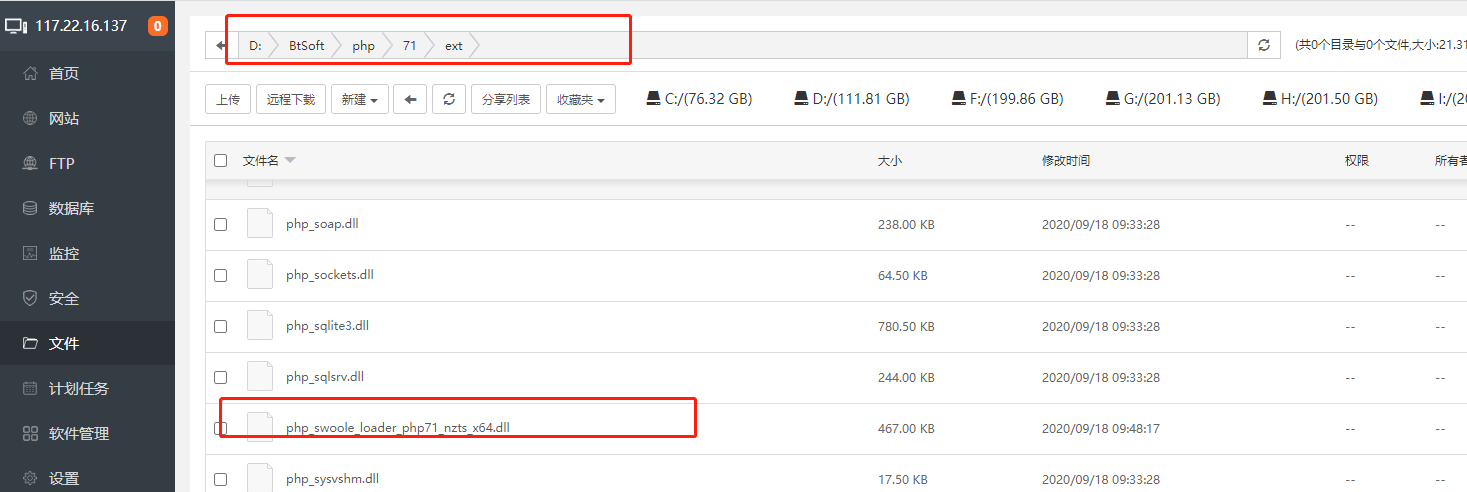
**在源码安装包`help/swoole-loader`目录找到对应 php 版本的 swoole-loader文件,复制。例如知识付费PHP版本为7.1,则复制php_swoole_loader_php71_nzts_x64.dll

9.粘贴到 php 的扩展目录:如图
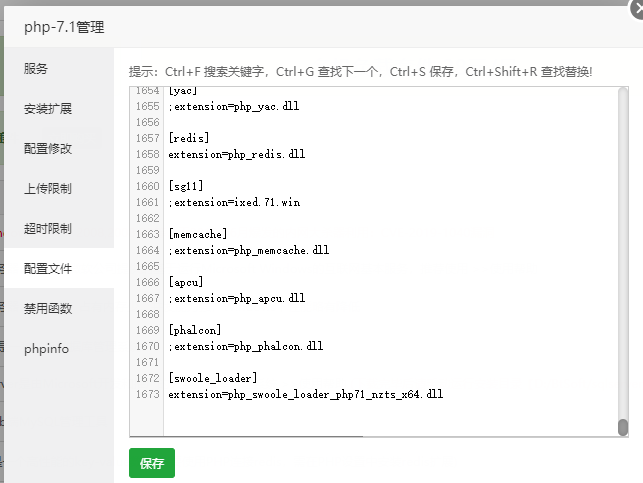
10.加载 swoole-loader 扩展,点击软件商店,php-7.1 设置,配置文件\*\*

然后修改php配置文件,添加
~~~
[swoole_loader]
extension=php_swoole_loader_php71_nzts_x64.dll
~~~
11.重载配置

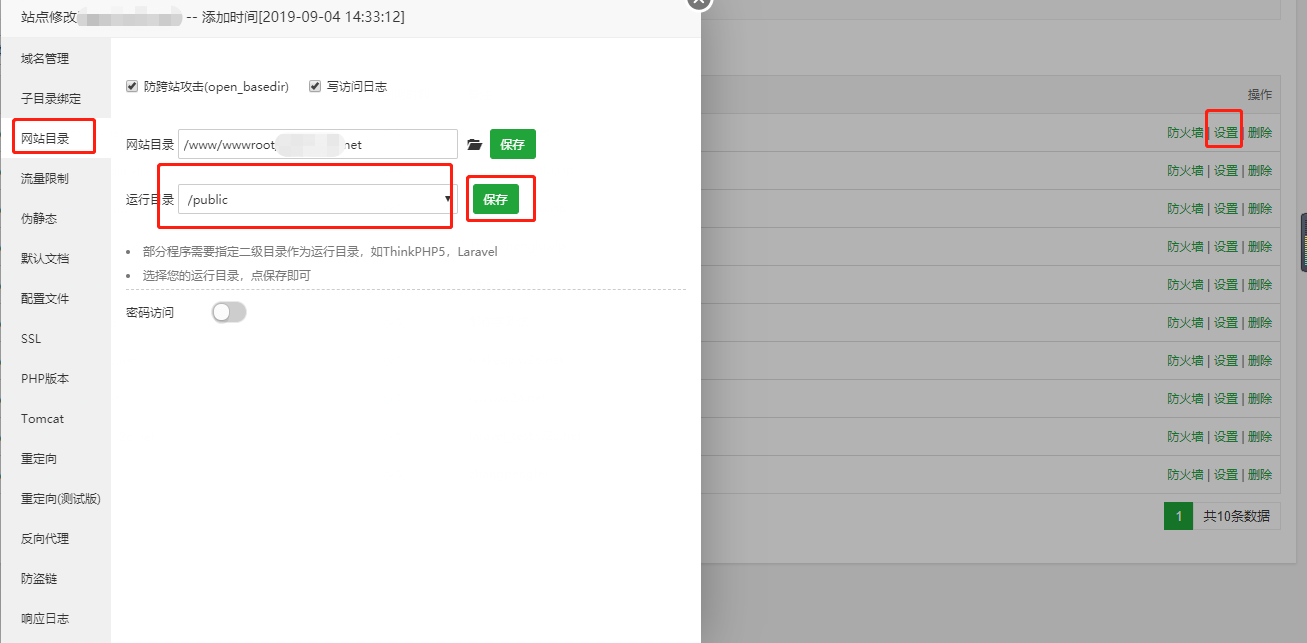
12.返回站点列表,点击右侧**设置**\->**网站目录**设置网站运行目录为public点击保存
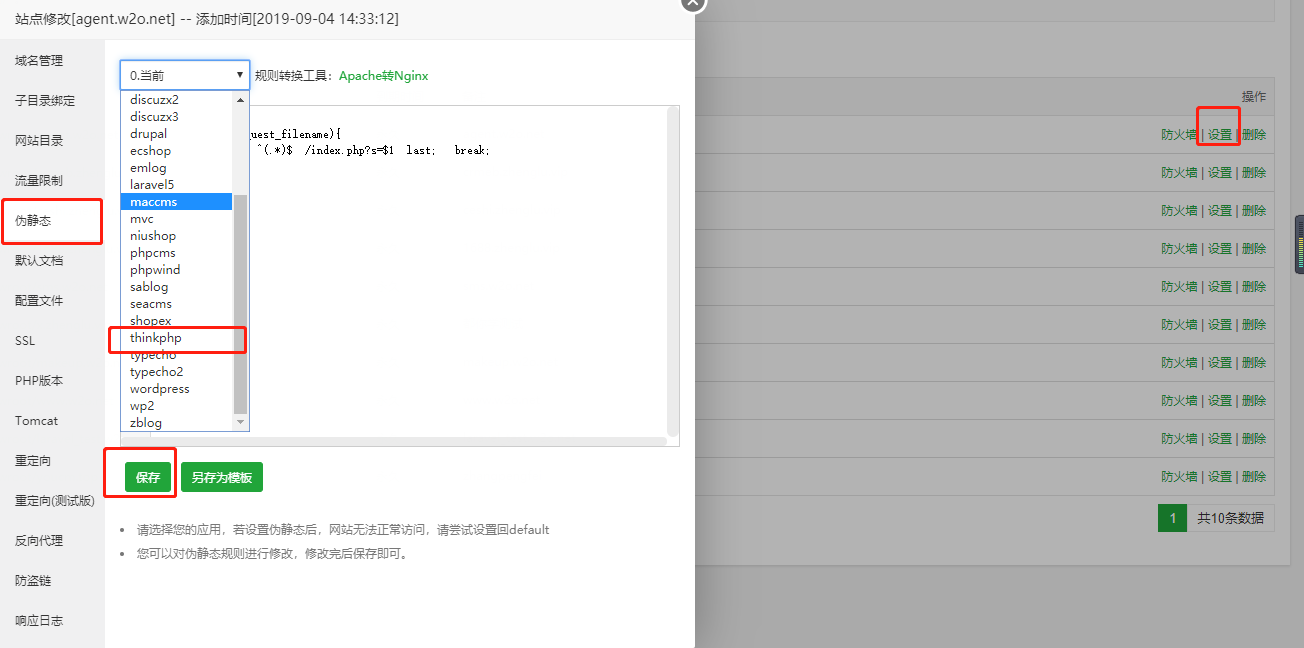
13.点击右侧**设置**\->**伪静态**设置伪静态,选择下拉框中的**thinkphp**点击保存生成配置
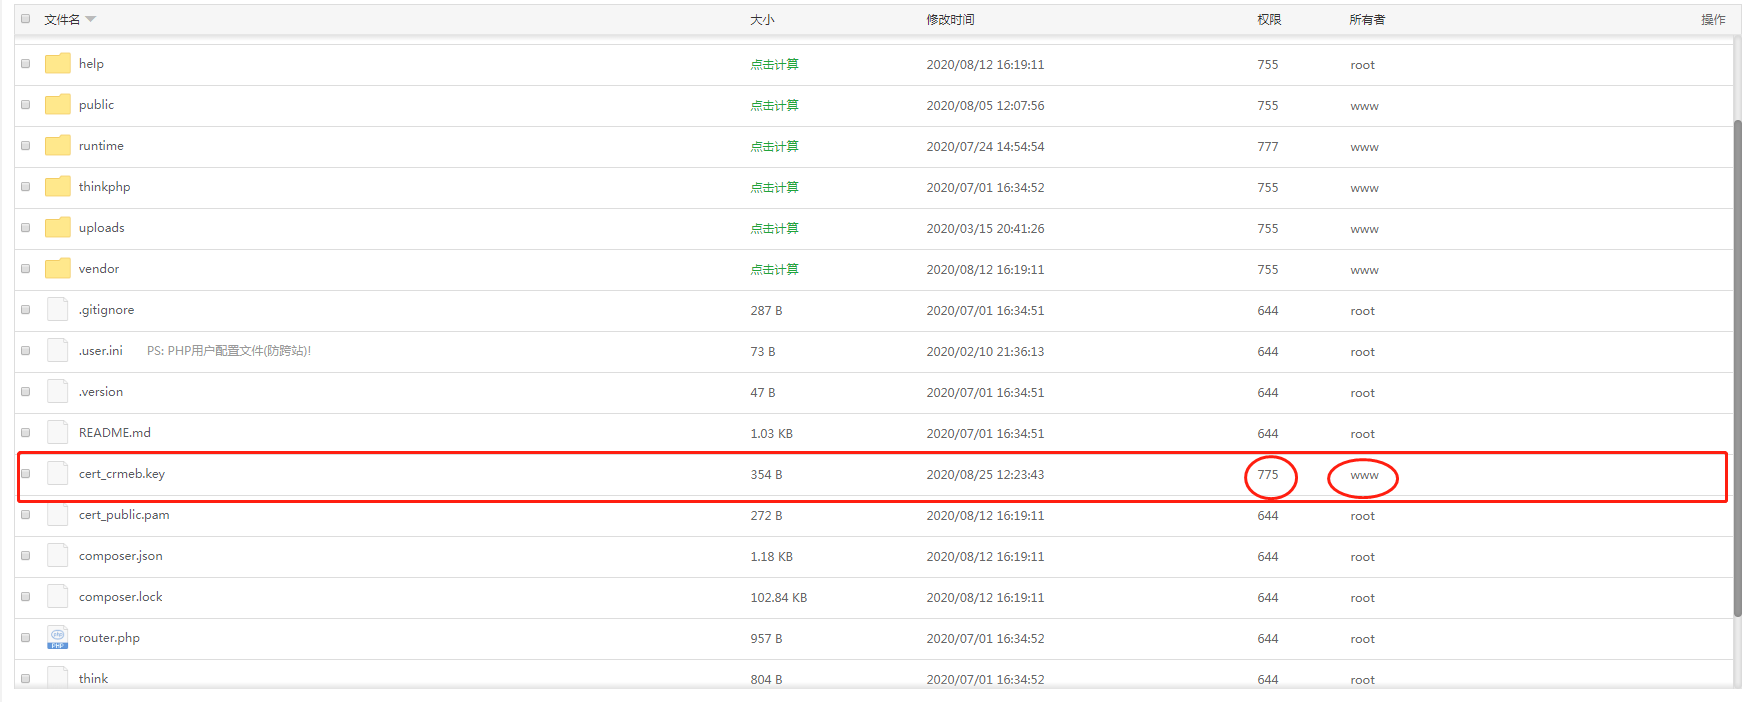
14.知识付费系统校验文件权限修改(根目录下)
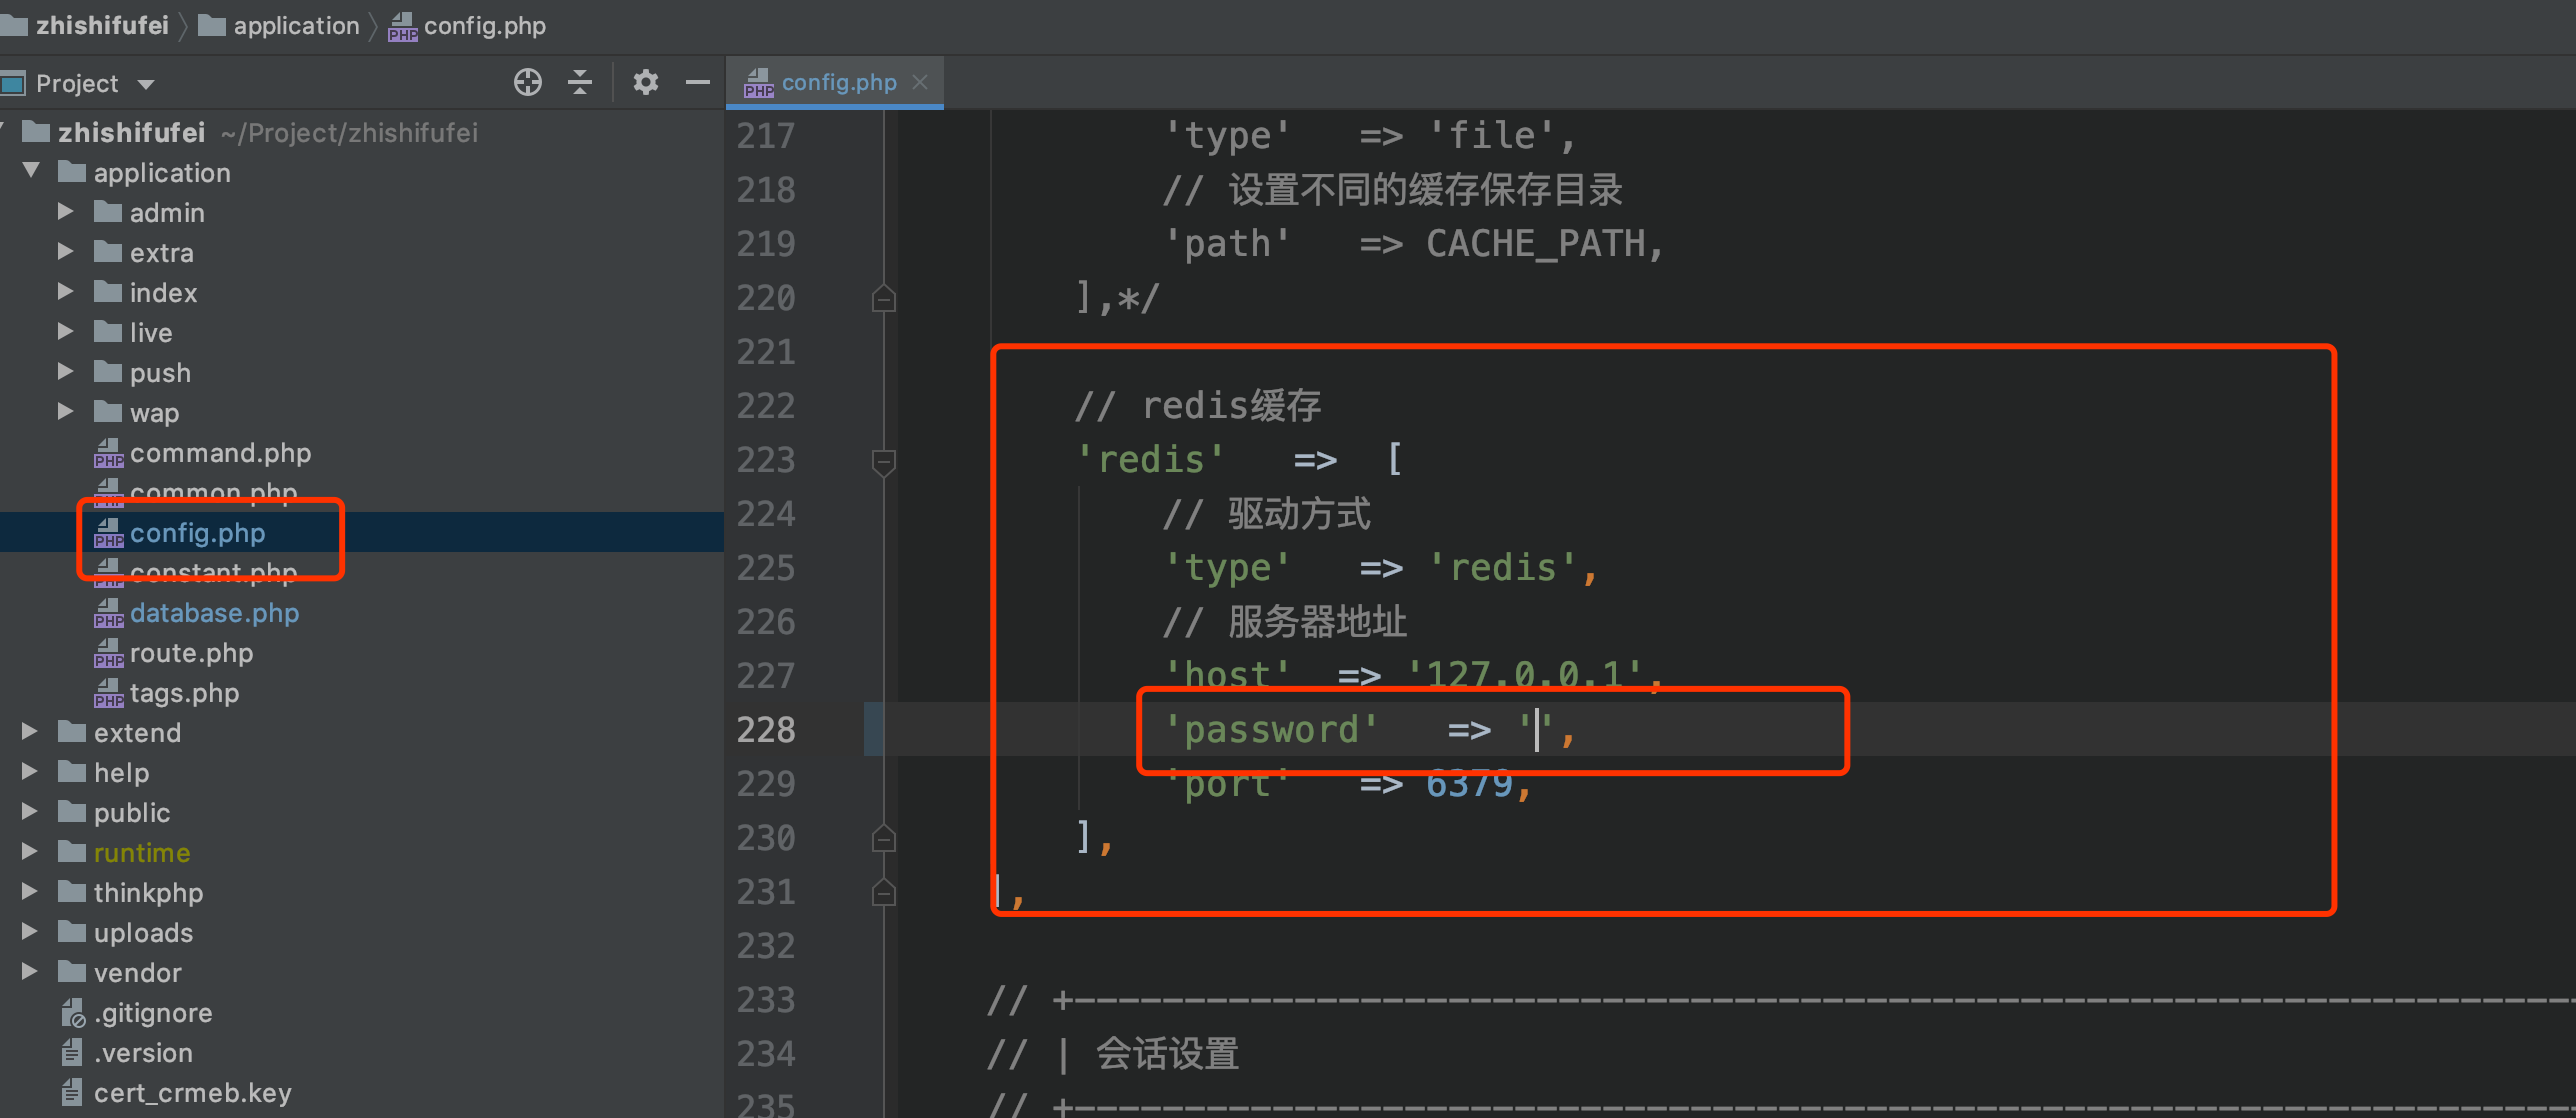
15.更改redis密码(reids已设置密码的可在此添加)
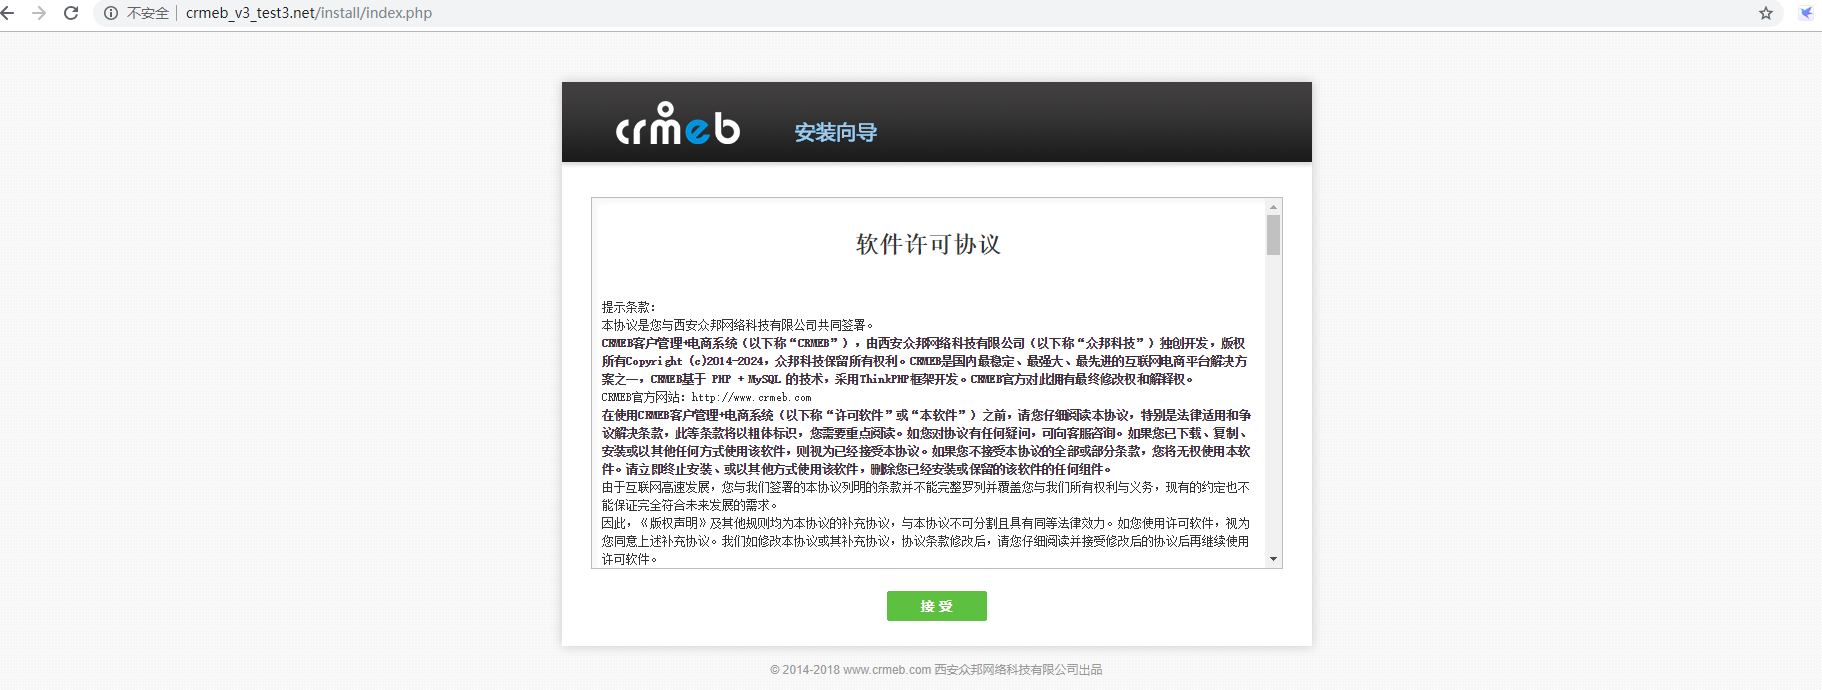
16.程序安装开始,第一步:点击**接受**
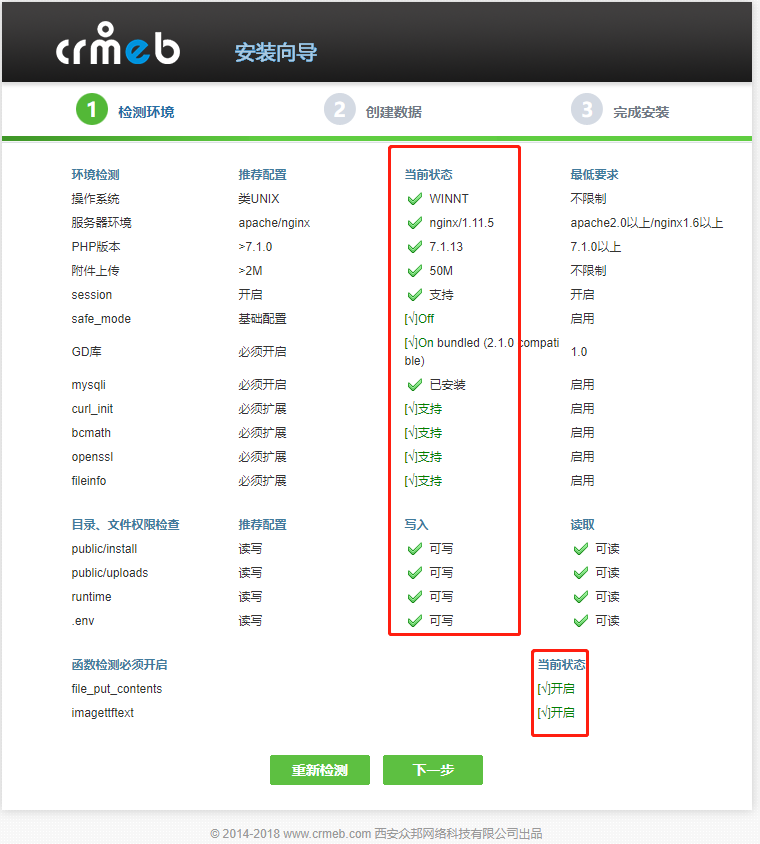
17.第二步:检查环境是否都正确,**确认无误点击下一步**。如有X号等错误提示,请根据提示修改服务器环境配置。
18.填写数据库用户名、数据库密码、数据库名。
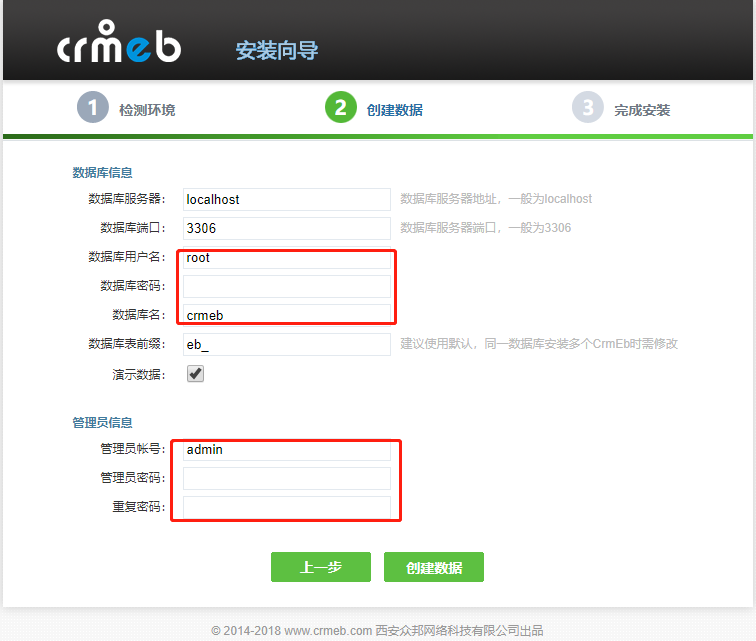
如果忘记数据库相关信息,可在**宝塔后台→数据库**中查看

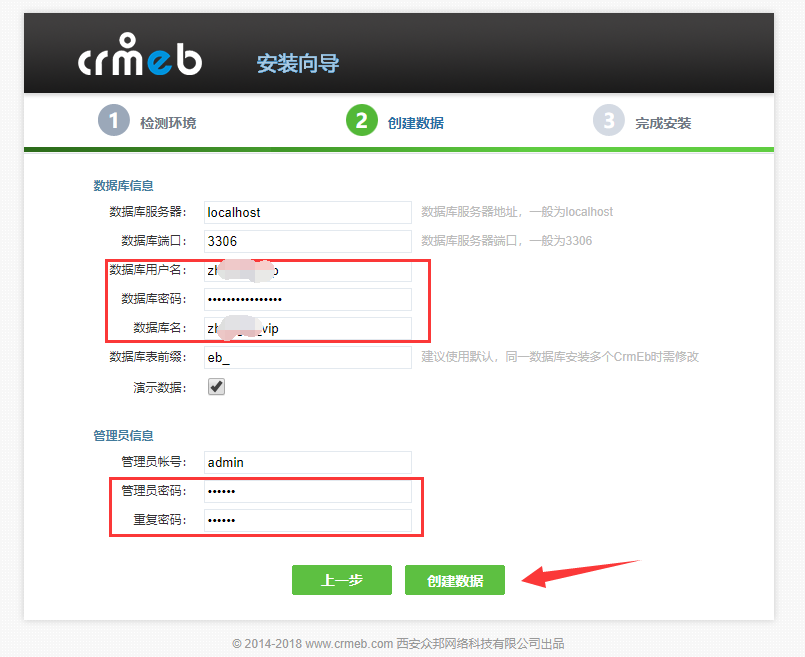
19.填写完数据库、管理员帐号密码后,点击**创建数据**。程序开始自动安装
20.等待程序安装
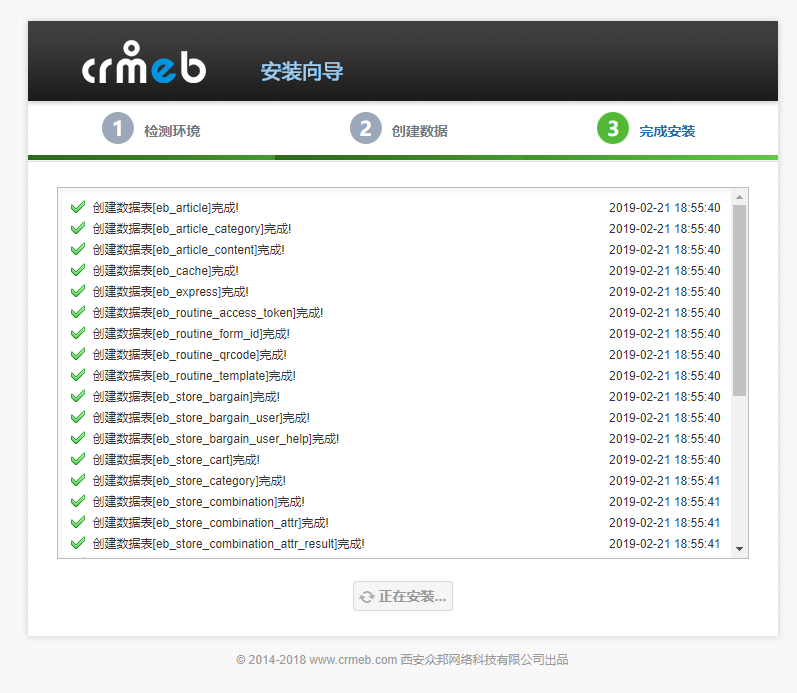
21.安装成功。可进入后台配置对接公众号信息
后台连接 如:[http://zhishifufei.crmeb.net/admin/login/index.html](http://zhishifufei.crmeb.net/admin/login/index.html)
前台连接 如:[http://zhishifufei.crmeb.net/wap/index/index.html](http://zhishifufei.crmeb.net/wap/index/index.html)
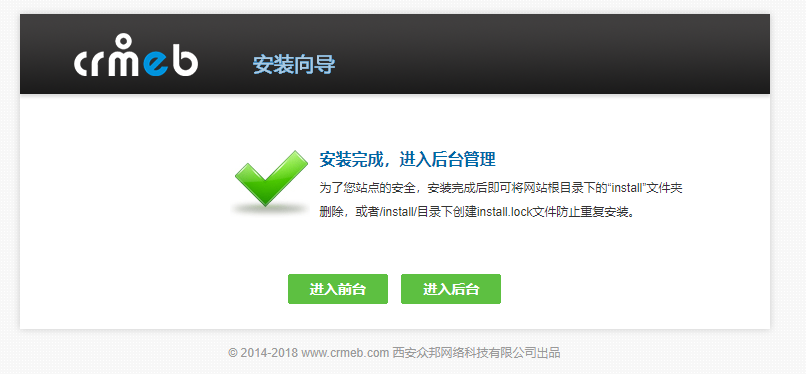
22.欢迎使用CRMEB-知识付费!

**配置环境变量**
23. 切换到桌面->右击->我的电脑->点击属性->点击高级系统设置 ->点击环境变量->点击编辑
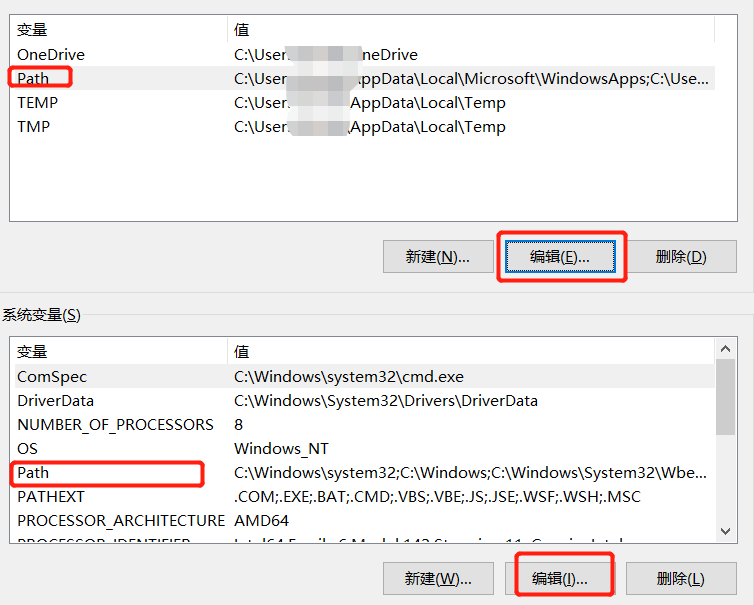
24. 粘连刚才复制的目录 注意最后面要带斜杠 【**将要使用的PHP版本绝对路径填入**】
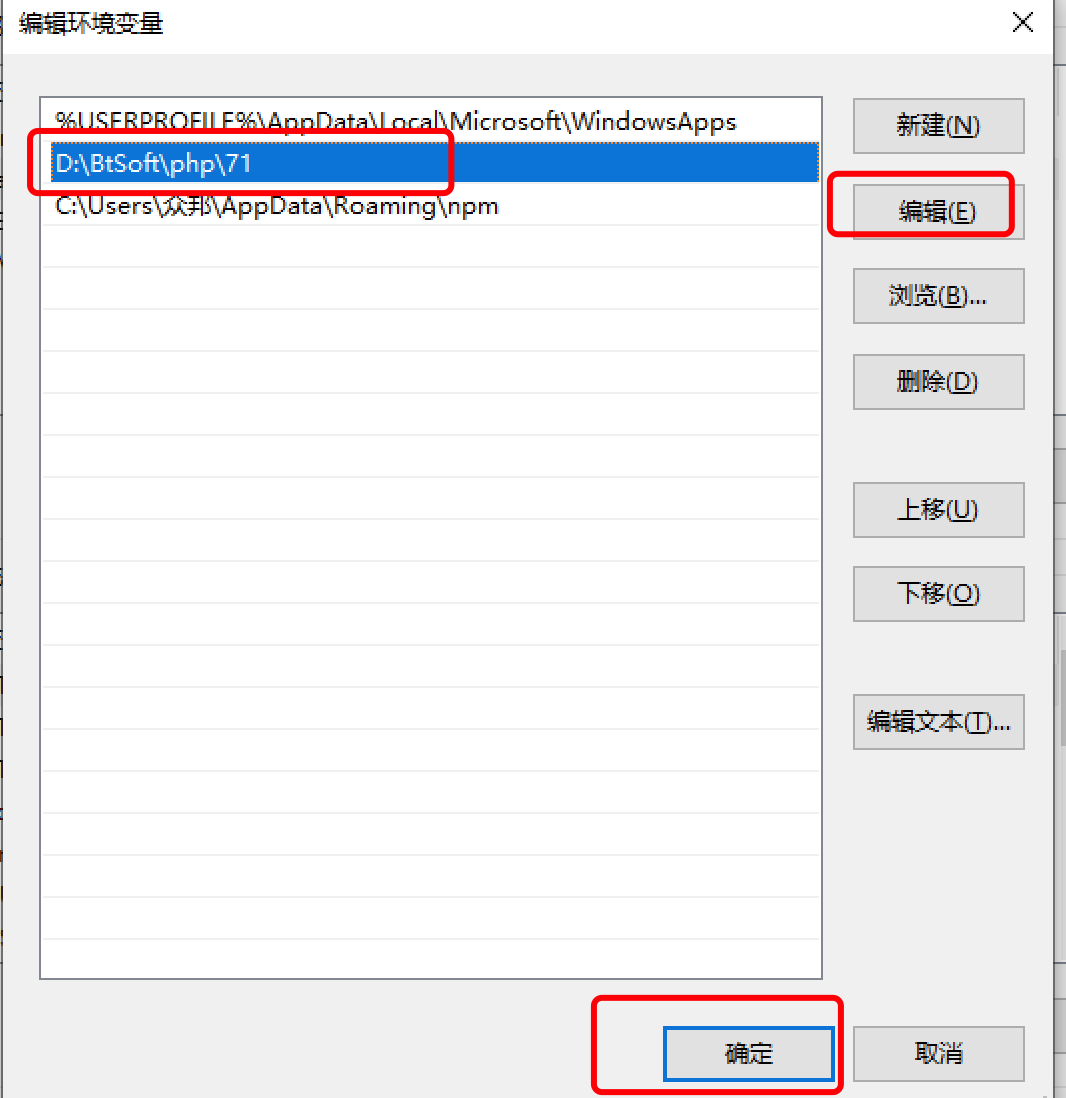
25. 点击确定保存配置,环境变量配置完毕
- 序言
- 系统简介
- 系统介绍
- 前端功能脑图
- 后端功能列表
- 项目介绍
- 免费版与商业版功能对比
- 源码安装(必看)
- 安装前必读
- 服务器及域名配置
- 服务器购买
- 服务器端口
- 域名购买
- 域名配置
- https域名
- ssl证书申请
- https域名配置
- 新手推荐-宝塔安装
- 【安装视频教程】
- 1.宝塔配置
- 1.服务器配置
- 2.登录宝塔
- 2.环境配置
- 3.安装 swoole-loader
- 4.源码安装
- 5.程序一键安装
- 6.启动命令
- 启动消息队列
- 启动workerman
- Windows环境安装
- windows+宝塔安装教程
- windows+phpstudy8 安装教程
- 伪静态配置
- 安装 swoole-loader
- workerman启动
- 手动安装教程
- 安装完检测
- 切换PHP版本
- 多项目部署
- 程序配置(必读)
- 公众号
- 公众号-域名配置
- 公众号-开发配置
- 公众号-模版消息
- 公众号-订阅消息
- 公众号-微信菜单
- 阿里云产品配置
- 阿里云购买产品
- key-阿里云key配置
- 视频加密-阿里云视频点播
- 阿里云资源包购买
- 上传图片视频配置(方法二选一 只需安装一个即可)
- 上传图片视频-系统后台配置
- 上传图片视频-阿里云平台配置
- 直播配置(方法二选一 只需安装一个即可)
- 直播-系统后台配置
- 直播-阿里云控制台配置
- 短信
- 短信-CRMEB短信平台
- 短信-阿里云短信
- 支付
- 公众号-微信端支付
- 公众号-h5端微信支付
- 公众号-微信扫码支付
- 支付宝-支付宝支付配置
- 支付宝-支付宝扫码支付
- workerman 启动
- 配置常见问题
- 项目更新及pc安装操作
- 项目更新说明
- pc端安装说明
- pc端更新说明
- 功能说明
- 前端界面说明
- 移动首页
- 分类
- 商品
- 个人中心
- 在线直播
- 添加直播
- 直播列表管理
- 礼物管理
- 直播带货
- 直播后台功能
- 直播间说明
- 商品管理
- 商品分类
- 商品列表
- 商品评论
- 专题课程
- 界面展示
- 添加专题
- 添加视频
- 素材管理
- 专题评论
- 轻专题
- 课程有效期
- 赠送好友
- 订单管理
- 新闻管理
- 拼团
- 添加拼团
- 添加拼团弹幕
- 拼团推荐到首页
- 分销规则
- 规则说明
- 分销配置
- 提现银行配置
- 会员功能
- 会员配置
- 会员使用
- 成为会员
- 活动管理
- 签到
- 余额支付
- 地址管理
- 设置子账号
- 讲师功能
- 推流软件使用
- 教务管理
- 老师管理
- 班级管理
- 助学工具
- 题库管理
- 试卷管理
- 证书管理
- 兑换码
- 资料下载
- pc端展示
- pc端开启
- PC端平台页面配置
- 网站统计
- 客服功能
- 微信客服
- CRMchat客服
- 短信通知
- 常见问题
- 数据库修改配置
- 后台接口访问异常
- workerman常见问题
- 直播常见问题
- 每月一号前端报500错
- redis密码
- 设置redis密码
- reids认证报错
- 密码有误
- 切换php版本
- 音视频上传有误
- 安装完成后台报语法错误
- 刷新缓存报错
- 安装完成报内存超出
- 直播弹幕或礼物有时候无法发出
- 安装无法修改写入权限
- windows下首页空白或提示控制器不存在
- 直播延迟问题
- OBS降低延迟
- 支付宝支付错误
- 支付宝支付报错invalid [default store dir]: /tmp/
- 阿里云oss设置防盗链
- 直播拉取回放
- 首页提示Undefined index: host
- 首页空白检查提示系统错误
- 客服功能报错
- 数据库主键冲突
- 微信菜单添加报错
- 微信提示用户信息获取失败
- 支付宝回调有问题
- 守护进程不显示
- 后台直播域名无法设置录制
- 后台题库批量导入报错
- pc配置不显示
- 商业授权
- 授权说明
- 申请授权
- 技术文档
- 页面链接
- 开发规范
- 数据字典
