## 一、前言
开发排查系统问题用得最多的手段就是查看系统日志,`ELK`是`Elastic`公司开源的实时日志处理与分析解决方案,已经为日志处理方案的主流选择。
而在生产环境中,如何针对`ELK`进行监控,保证各个组件正常运行?如何知道目前的资源是否能承受线上的压力呢?本文主要是以`Elastic Stack 7.x`版本为例,介绍如何监控`ELK`自身的各个组件。
## 二、总体架构
常见的`Elastic Stack`日志系统架构如下
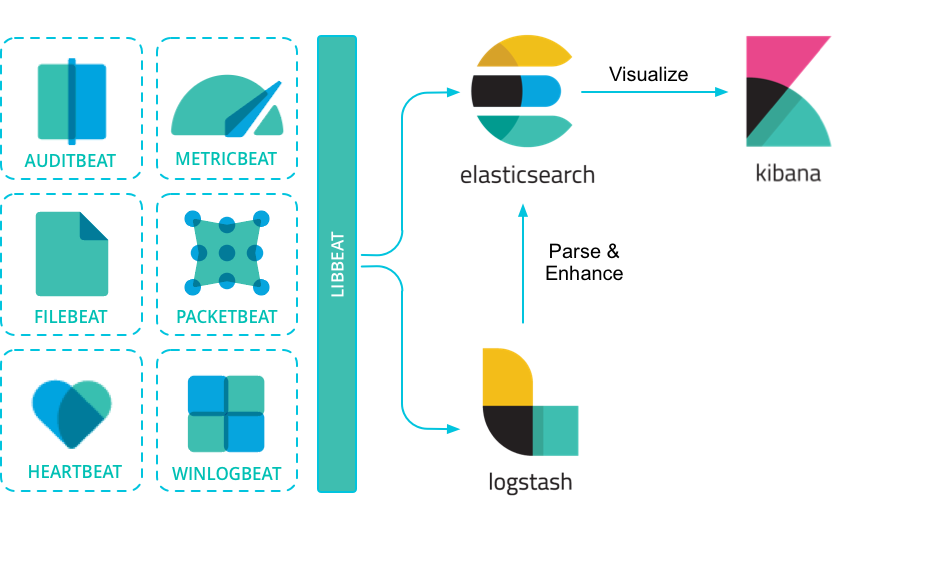
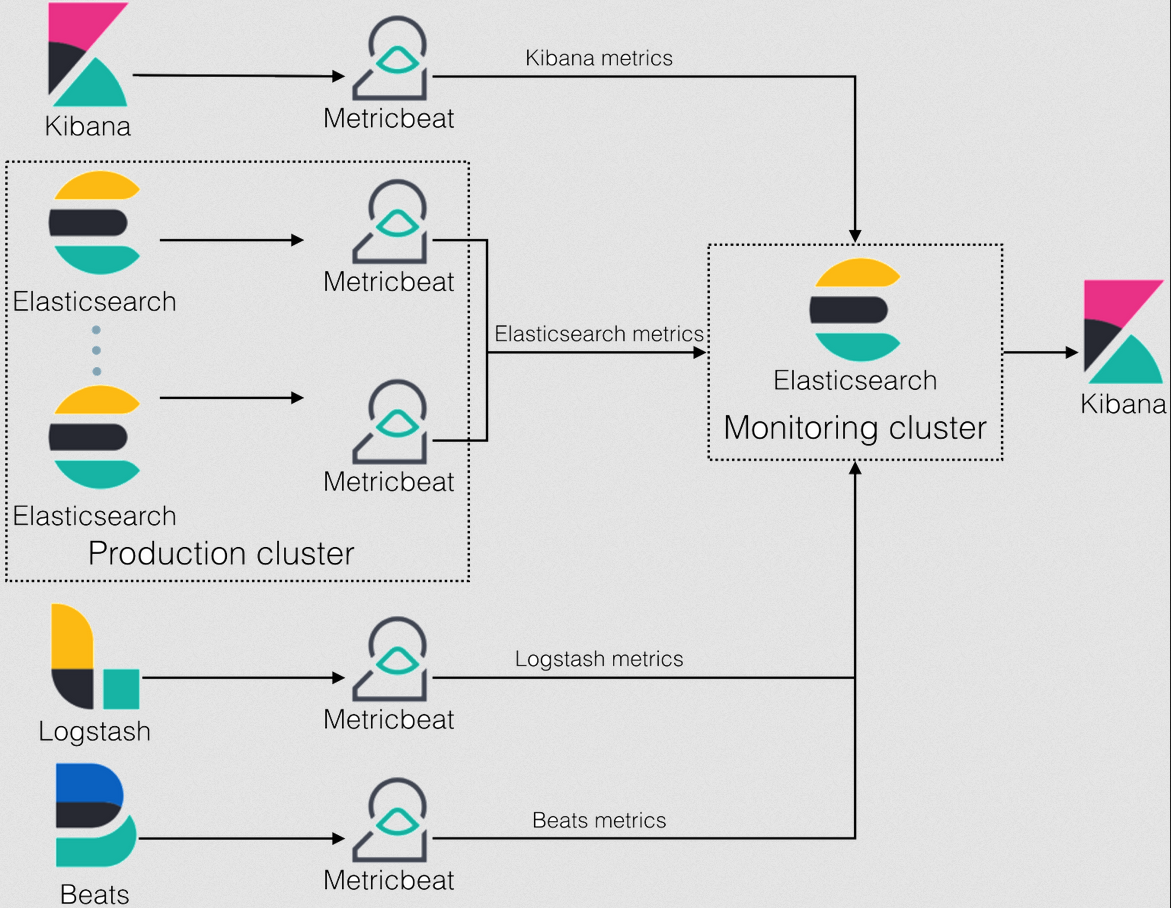
其中可使用`Metricbeat`组件作为轻量级监视代理,通过HTTP端点收集各个组件的监控信息,并把监控数据落盘到`Elasticsearch`中,最终通过`Kibana`以图形化的方式展示各种监控数据。
## 三、部署Metricbeat
建议在每台服务器上都运行`Metricbeat`收集指标,多个Metricbeat实例的指标将在`Elasticsearch`服务器上合并。
下载对应版本的`Metricbeat`地址如下:
[https://www.elastic.co/cn/downloads/past-releases#metricbeat](https://www.elastic.co/cn/downloads/past-releases#metricbeat)
### 3.1. 收集Elasticsearch信息
在`Metricbeat`中启用并配置`Elasticsearch x-pack`模块
从安装目录中,运行:
~~~
./metricbeat modules enable elasticsearch-xpack
~~~
默认情况下,模块从[http://localhost:9200](http://localhost:9200/)收集 Elasticsearch 指标。如果本地服务器有不同的地址,请在 modules.d/elasticsearch-xpack.yml 中将其添加到主机设置。
### 3.2. 收集Kibana信息
在`Metricbeat`中启用并配置`Kibana x-pack`模块
~~~
./metricbeat modules enable kibana-xpack
~~~
该模块将默认从[http://localhost:5601](http://localhost:5601/)收集 Kibana 监测指标。如果本地 Kibana 实例有不同的地址,则必须通过 modules.d/kibana-xpack.yml 文件中的 hosts 设置进行指定。
### 3.3. 收集Logstash信息
在`Metricbeat`中启用并配置`Logstash x-pack`模块
~~~
./metricbeat modules enable logstash-xpack
~~~
该模块将默认从[http://localhost:9600](http://localhost:9600/)收集 Logstash 监测指标。如果本地 Logstash 实例有不同的地址,则必须通过 modules.d/logstash-xpack.yml 文件中的 hosts 设置进行指定。
### 3.4. 收集Beats信息
> 所有类型的`Beats`配置都一样
#### 3.4.1. 开启HTTP端点
需要开启`Beats`自己的HTTP端点输出监控数据,例如`Filebeat`修改`filebeat.yml`文件,在最后添加以下配置
~~~
http:
enabled: true
host: 0.0.0.0
port: 5066
~~~
#### 3.4.2. 启用Beat模块
在`Metricbeat`中启用并配置`Beat x-pack`模块
~~~
./metricbeat modules enable beat-xpack
~~~
该模块将默认从[http://localhost:5066](http://localhost:5066/)收集 beat 监测指标。如果正在监测的 beat 实例有不同的地址,则必须通过 modules.d/beat-xpack.yml 文件中的 hosts 设置进行指定。
### 3.5. 数据输出配置
配置`Metricbeat`以发送至监测集群,在`metricbeat.yml`文件中修改以下内容
~~~
output.elasticsearch:
hosts: ["http://localhost:9200"] ## Monitoring cluster
# Optional protocol and basic auth credentials.
#protocol: "https"
#username: "elastic"
#password: "changeme"
~~~
> **PS**:地址、用户名和密码按实际情况修改
### 3.6. 启动Metricbeat
~~~
./metricbeat -e
~~~
## 四、收集Elasticsearch日志
使用`Filebeat`收集`Elasticsearch`自身的日志数据。
首先需要在`Elasticsearch`所在的服务器中安装`Filebeat`组件。
### 4.1. 启用es模块
在`Filebeat`中启用并配置`Elasticsearch`模块,执行以下命令
~~~
./filebeat modules enable elasticsearch
~~~
### 4.2. 配置es模块
修改es模块的配置信息,指定日志路径
~~~
vim modules.d/elasticsearch.yml
~~~
修改为以下内容
~~~
- module: elasticsearch
server:
enabled: true
var.paths:
- /app/elk/elasticsearch/logs/*_server.json
gc:
enabled: true
var.paths:
- /app/elk/elasticsearch/logs/gc.log.[0-9]*
- /app/elk/elasticsearch/logs/gc.log
audit:
enabled: true
var.paths:
- /app/elk/elasticsearch/logs/*_audit.json
slowlog:
enabled: true
var.paths:
- /app/elk/elasticsearch/logs/*_index_search_slowlog.json
- /app/elk/elasticsearch/logs/*_index_indexing_slowlog.json
deprecation:
enabled: true
var.paths:
- /app/elk/elasticsearch/logs/*_deprecation.json
~~~
> **PS**:日志路径按实际情况修改
### 4.3. 配置输出
修改`filebeat.yml`文件,配置es相关信息
~~~
output.elasticsearch:
hosts: ["localhost:9200"]
# Optional protocol and basic auth credentials.
#protocol: "https"
#username: "elastic"
#password: "changeme"
~~~
> **PS**:地址、用户名和密码按实际情况修改
### 4.4. 启动Filebeat
~~~
./filebeat -c filebeat.yml -e
~~~
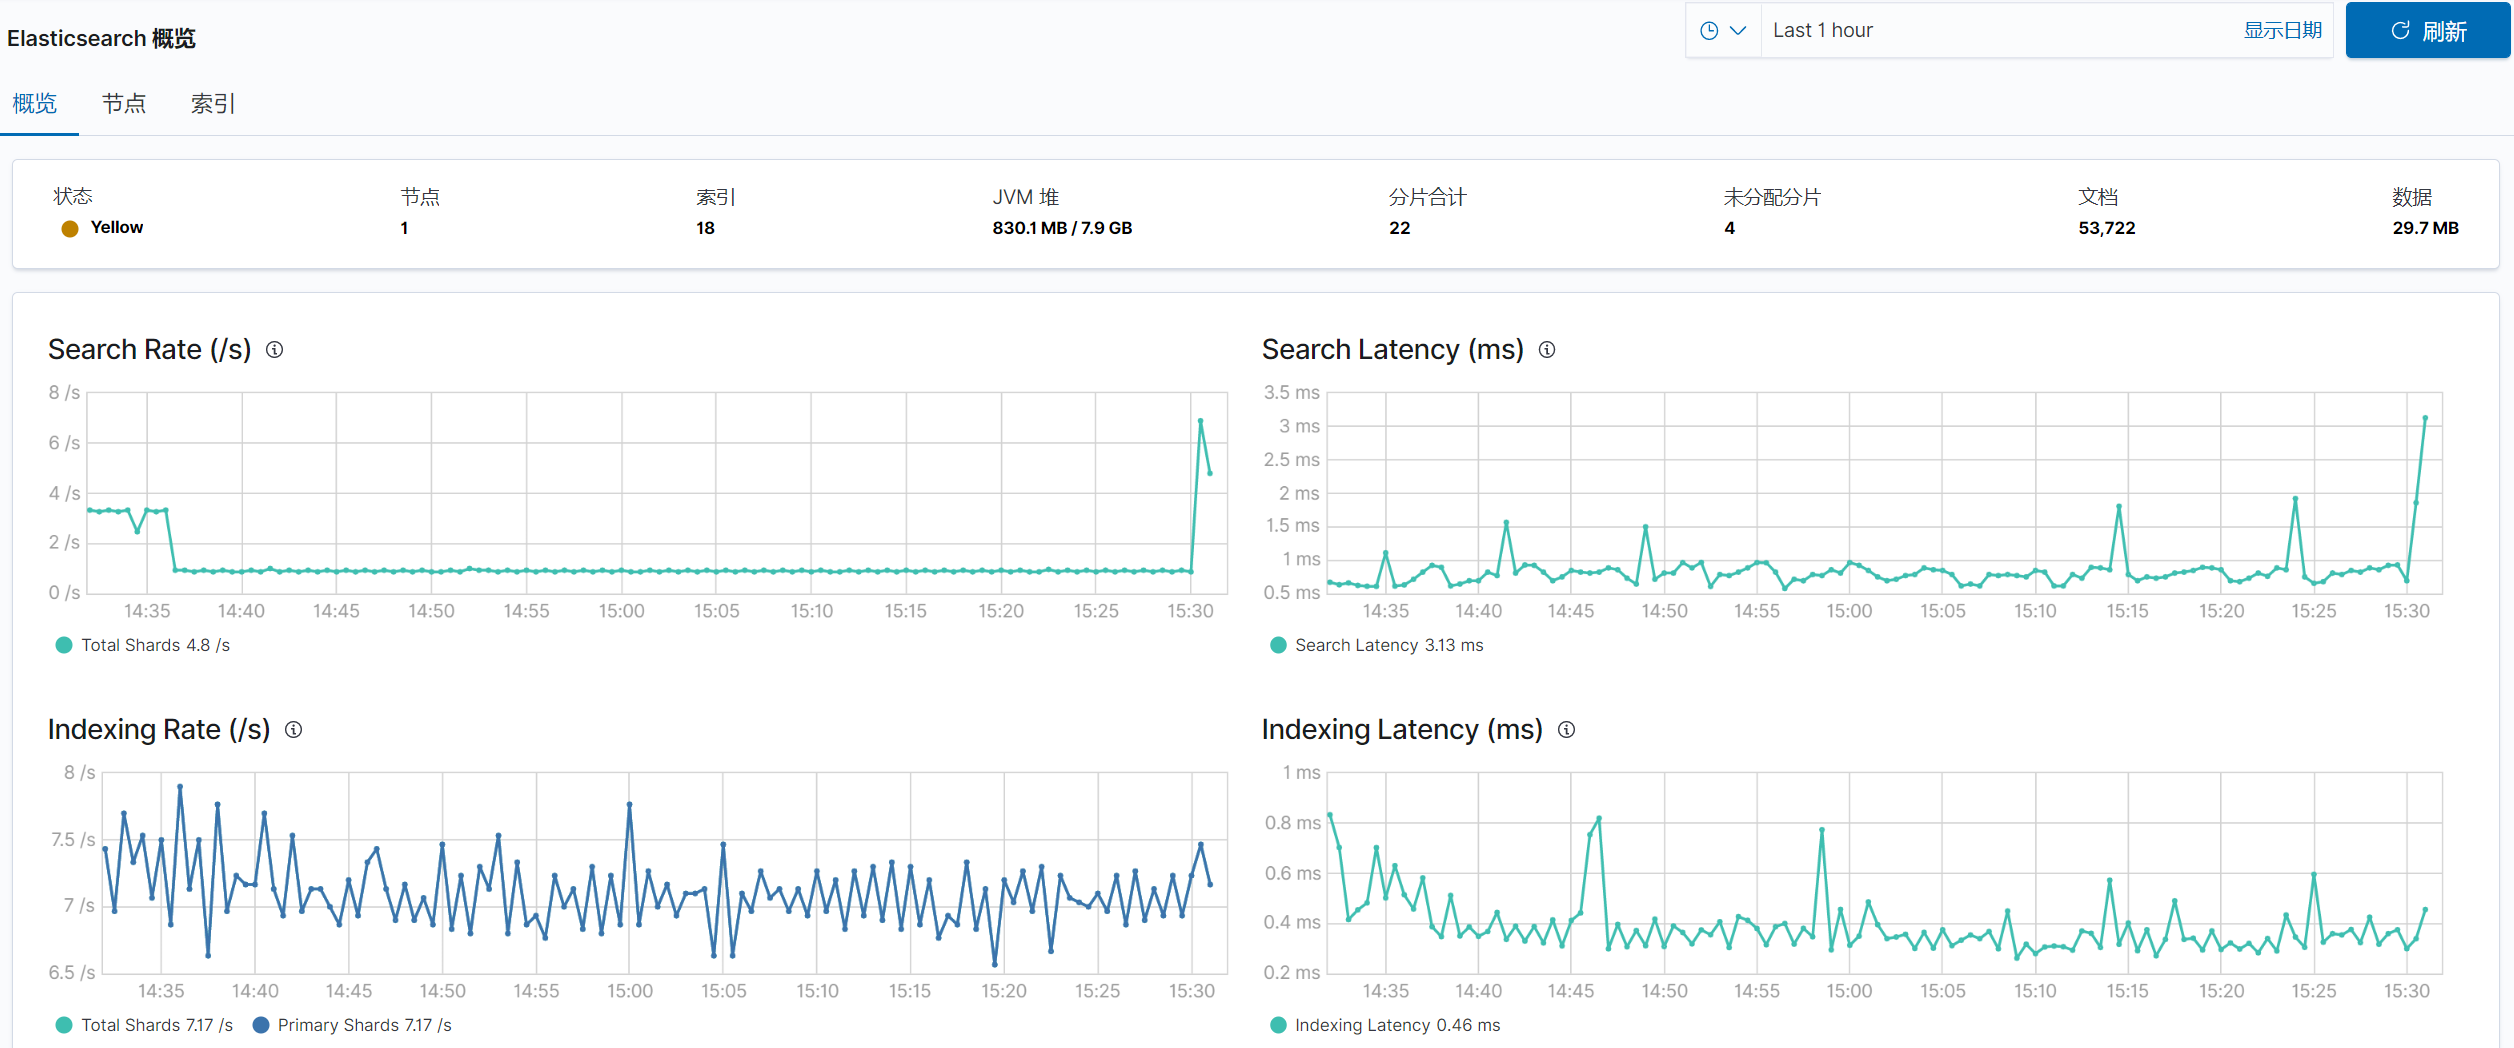
## 五、查看监控界面
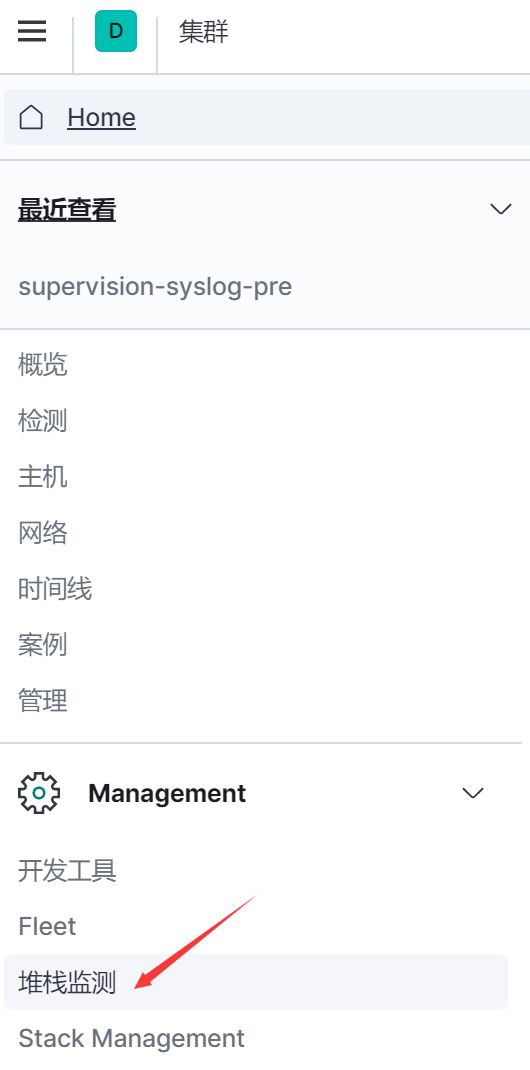
进入`Kibana`的控制台界面,进入`堆栈监测`菜单
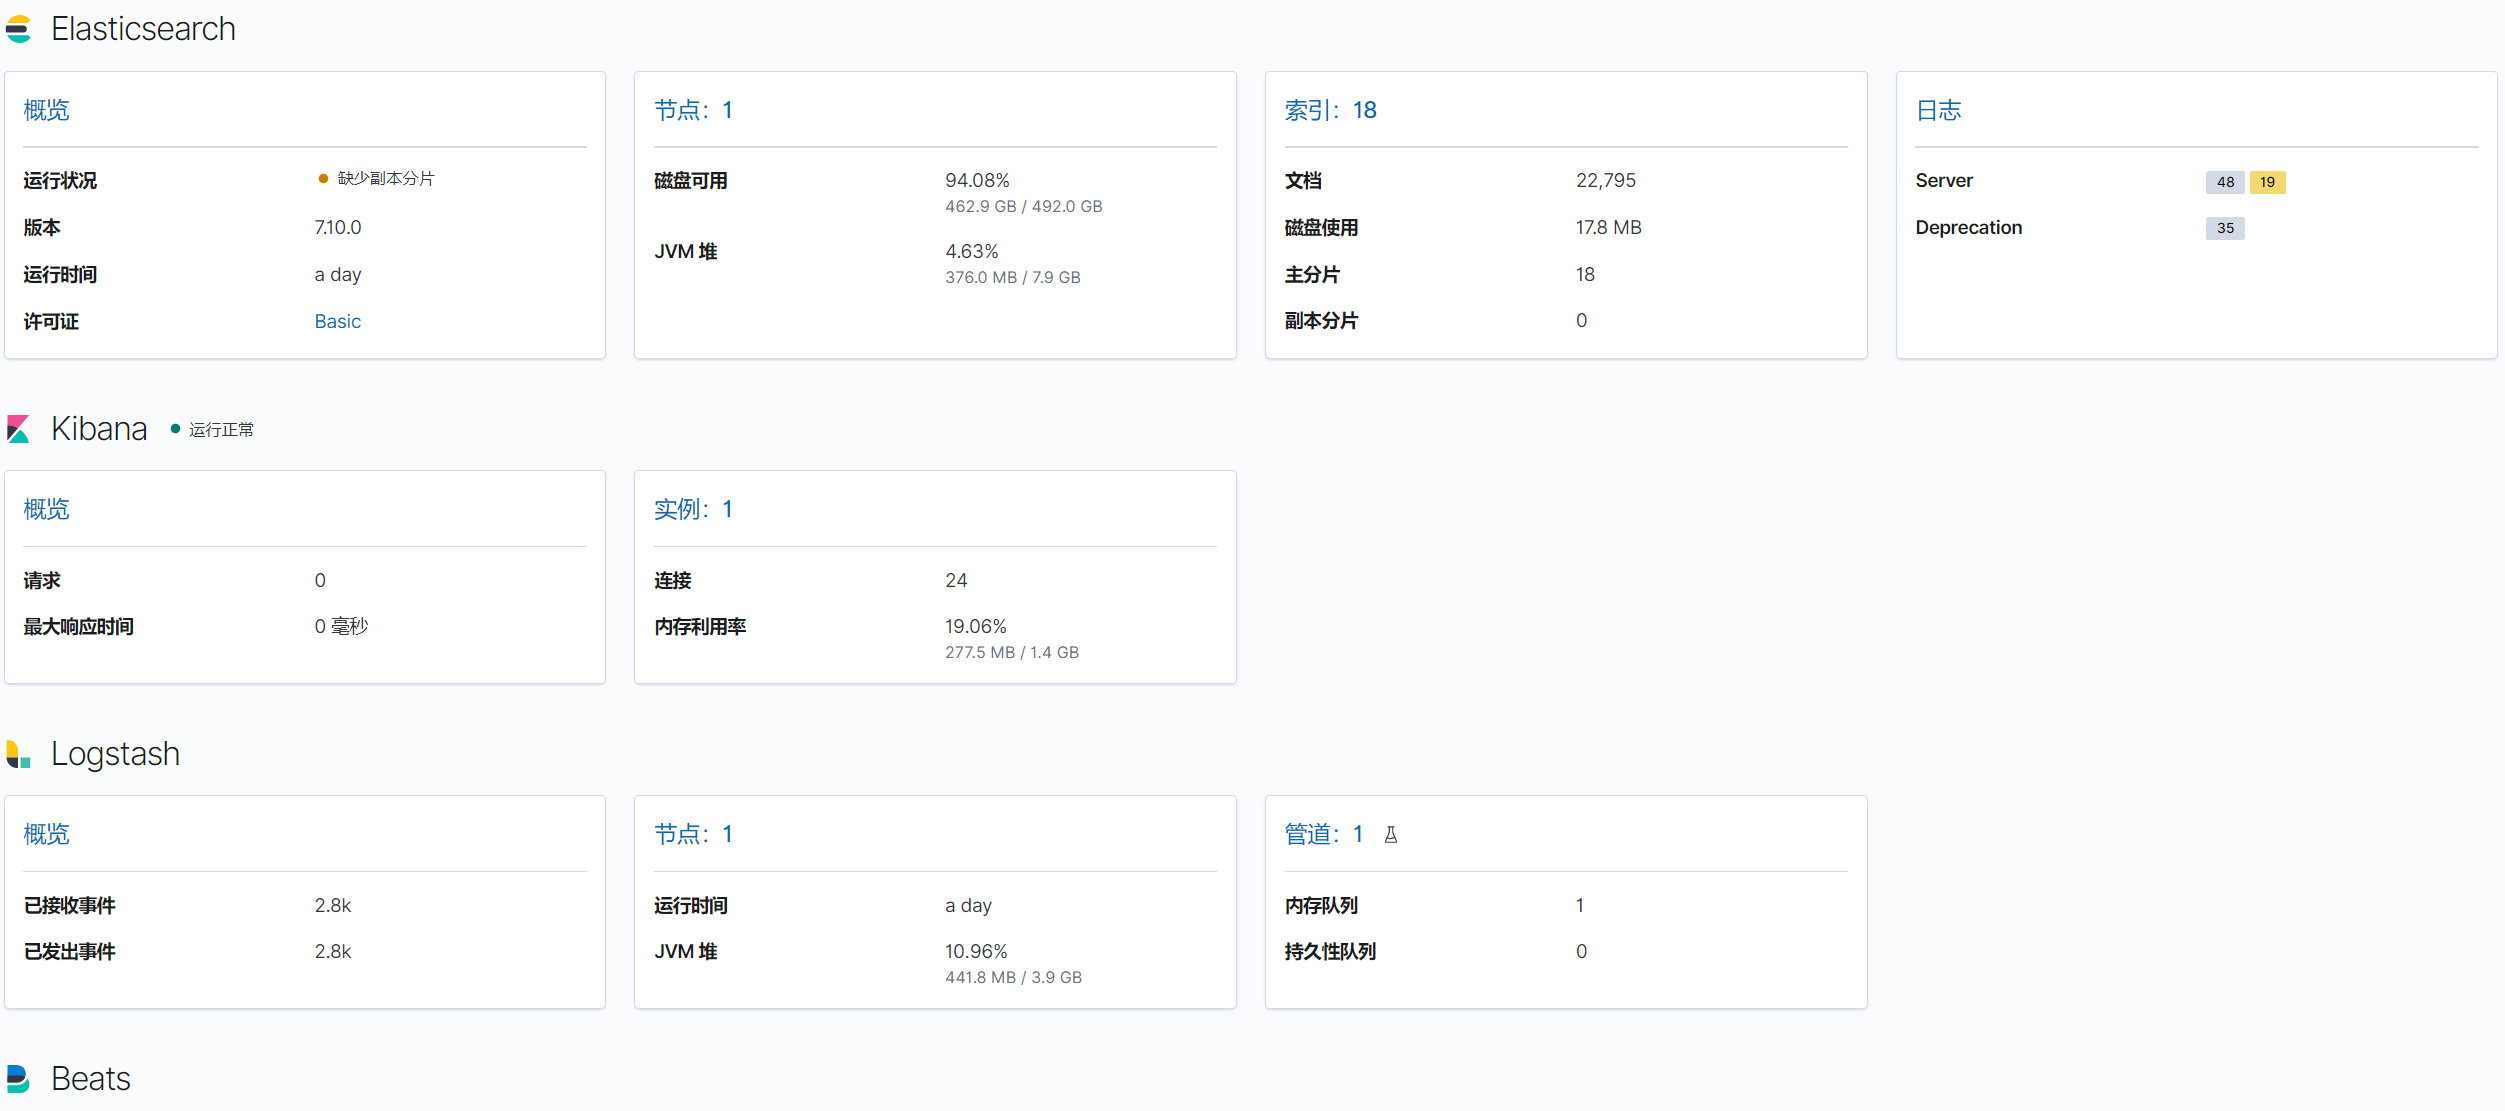
即可查看各个组件的监控信息
- springcloud
- springcloud的作用
- springboot服务提供者和消费者
- Eureka
- ribbon
- Feign
- feign在微服务中的使用
- feign充当http请求工具
- Hystrix 熔断器
- Zuul 路由网关
- Spring Cloud Config 分布式配置中心
- config介绍与配置
- Spring Cloud Config 配置实战
- Spring Cloud Bus
- gateway
- 概念讲解
- 实例
- GateWay
- 统一日志追踪
- 分布式锁
- 1.redis
- springcloud Alibaba
- 1. Nacos
- 1.1 安装
- 1.2 特性
- 1.3 实例
- 1. 整合nacos服务发现
- 2. 整合nacos配置功能
- 1.4 生产部署方案
- 环境隔离
- 原理讲解
- 1. 服务发现
- 2. sentinel
- 3. Seata事务
- CAP理论
- 3.1 安装
- 分布式协议
- 4.熔断和降级
- springcloud与alibba
- oauth
- 1. abstract
- 2. oauth2 in micro-service
- 微服务框架付费
- SkyWalking
- 介绍与相关资料
- APM系统简单对比(zipkin,pinpoint和skywalking)
- server安装部署
- agent安装
- 日志清理
- 统一日志中心
- docker安装部署
- 安装部署
- elasticsearch 7.x
- logstash 7.x
- kibana 7.x
- ES索引管理
- 定时清理数据
- index Lifecycle Management
- 没数据排查思路
- ELK自身组件监控
- 多租户方案
- 慢查询sql
- 日志审计
- 开发
- 登录认证
- 链路追踪
- elk
- Filebeat
- Filebeat基础
- Filebeat安装部署
- 多行消息Multiline
- how Filebeat works
- Logstash
- 安装
- rpm安装
- docker安装Logstash
- grok调试
- Grok语法调试
- Grok常用表达式
- 配置中常见判断
- filter提取器
- elasticsearch
- 安装
- rpm安装
- docker安装es
- 使用
- 概念
- 基础
- 中文分词
- 统计
- 排序
- 倒排与正排索引
- 自定义dynamic
- 练习
- nested object
- 父子关系模型
- 高亮
- 搜索提示
- kibana
- 安装
- docker安装
- rpm安装
- 整合
- 收集日志
- 慢sql
- 日志审计s
- 云
- 分布式架构
- 分布式锁
- Redis实现
- redisson
- 熔断和降级
