> Go语言内置了获取程序的运行数据的工具,包括以下两个标准库:
** runtime/pprof:采集工具型应用运行数据进行分析
** net/http/pprof:采集服务型应用运行时数据进行分析
> pprof开启后,每隔一段时间(10ms)就会收集下当前的堆栈信息,获取各个函数占用的CPU以及内存资源;最后通过对这些采样数据进行分析,形成一个性能分析报告
> 注意,我们只应该在性能测试的时候才在代码中引入pprof。
[TOC]
## 工具型应用
> 如果你的应用程序是运行一段时间就结束退出类型,可以使用`runtime/pprof库`进行测试
### 测试程序 (test.go)
~~~
package main
import (
"fmt"
"os"
"runtime/pprof"
"time"
)
// 一段有问题的代码
func logicCode() {
var c chan int
for {
select {
case v := <-c:
fmt.Printf("recv from chan, value:%v\n", v)
default:
}
}
}
func main() {
// CPU 性能测试
file, err := os.Create("./cpu.pprof")
if err != nil {
fmt.Printf("create cpu pprof failed, err:%v\n", err)
return
}
pprof.StartCPUProfile(file)
defer pprof.StopCPUProfile()
for i := 0; i < 8; i++ {
go logicCode()
}
time.Sleep(20 * time.Second)
// Mem 性能测试
file2, err2 := os.Create("./mem.pprof")
if err != nil {
fmt.Printf("create mem pprof failed, err:%v\n", err2)
return
}
pprof.WriteHeapProfile(file2)
file.Close()
}
~~~
> 程序执行后,等待30秒后会在当前目录下生成一个`cpu.pprof`文件
### 解析分析报告
~~~
go tool pprof cpu.pprof
~~~
> 执行上面的代码会进入交互界面,输入`top3`来查看程序中占用CPU前3位的函数
~~~
top3
~~~
> 其中:
* flat:当前函数占用CPU的耗时
* flat::当前函数占用CPU的耗时百分比
* sun%:函数占用CPU的耗时累计百分比
* cum:当前函数加上调用当前函数的函数占用CPU的总耗时
* cum%:当前函数加上调用当前函数的函数占用CPU的总耗时百分比
* 最后一列:函数名称
> 我们还可以使用`list命令`查看具体的函数分析,例如执行`list logicCode`查看我们编写的函数的详细分析
~~~
list logicCode
~~~
### 图形化分析报告
> 需要安装`graphviz`工具
> 下载地址:https://graphviz.org/download/,linux安装使用 `yum install graphviz`
~~~
go tool pprof --pdf cpu.pprof
~~~
## 服务型应用
> 如果你的应用程序是一直运行的,比如web应用,那么可以使用`net/http/pprof库`,它能够在提供 HTTP 服务进行分析
### web服务引如pprof
~~~
package main
import (
"github.com/gin-contrib/pprof"
"github.com/gin-gonic/gin"
)
func main() {
router := gin.Default()
pprof.Register(router)
...
router.Run(":8080")
}
~~~
### 访问性能测试web页面
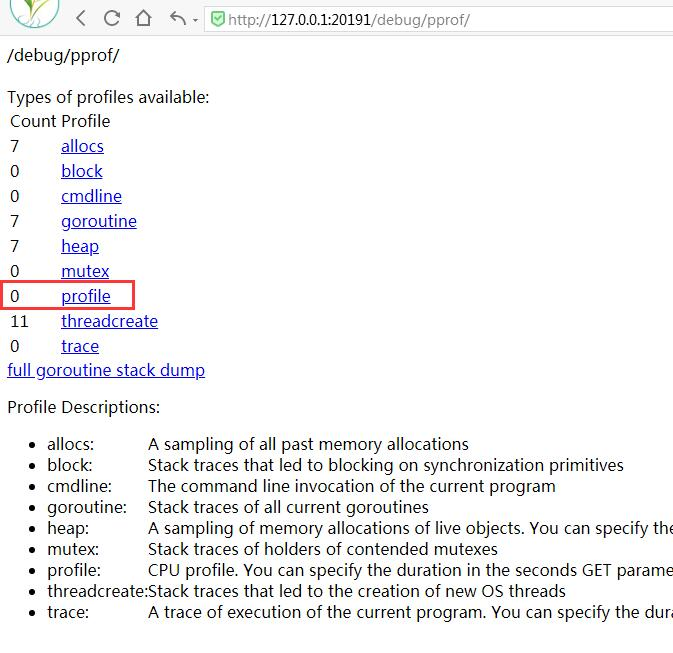
> 地址:http://localhost:8080/debug/pprof/

* /debug/pprof/profile:访问这个链接会自动进行 CPU profiling,持续 30s,并生成一个文件供下载
* /debug/pprof/heap: Memory Profiling 的路径,访问这个链接会得到一个内存 Profiling 结果的文件
* /debug/pprof/block:block Profiling 的路径
* /debug/pprof/goroutines:运行的 goroutines 列表,以及调用关系
### 编写测试代码
> 路径:/test/request_test.go
~~~
package test
import (
"fmt"
"io/ioutil"
"net/http"
"testing"
)
// 向web接口请求,用于收集cpu占用情况。
func TestPprof(t *testing.T) {
for i := 1; i <= 500; i++ {
resp, _ := http.Get("http://localhost:8080/pro/test")
defer resp.Body.Close()
body, _ := ioutil.ReadAll(resp.Body)
fmt.Println(string(body))
}
}
~~~
### 生成测试报告
> 点击`测试web页面`中的`profile`,进行cpu上的测试,点击后30s后会生成测试文件,在此期间快速的模拟访问,可执行以下脚本
~~~
go test test/request_test.go
~~~
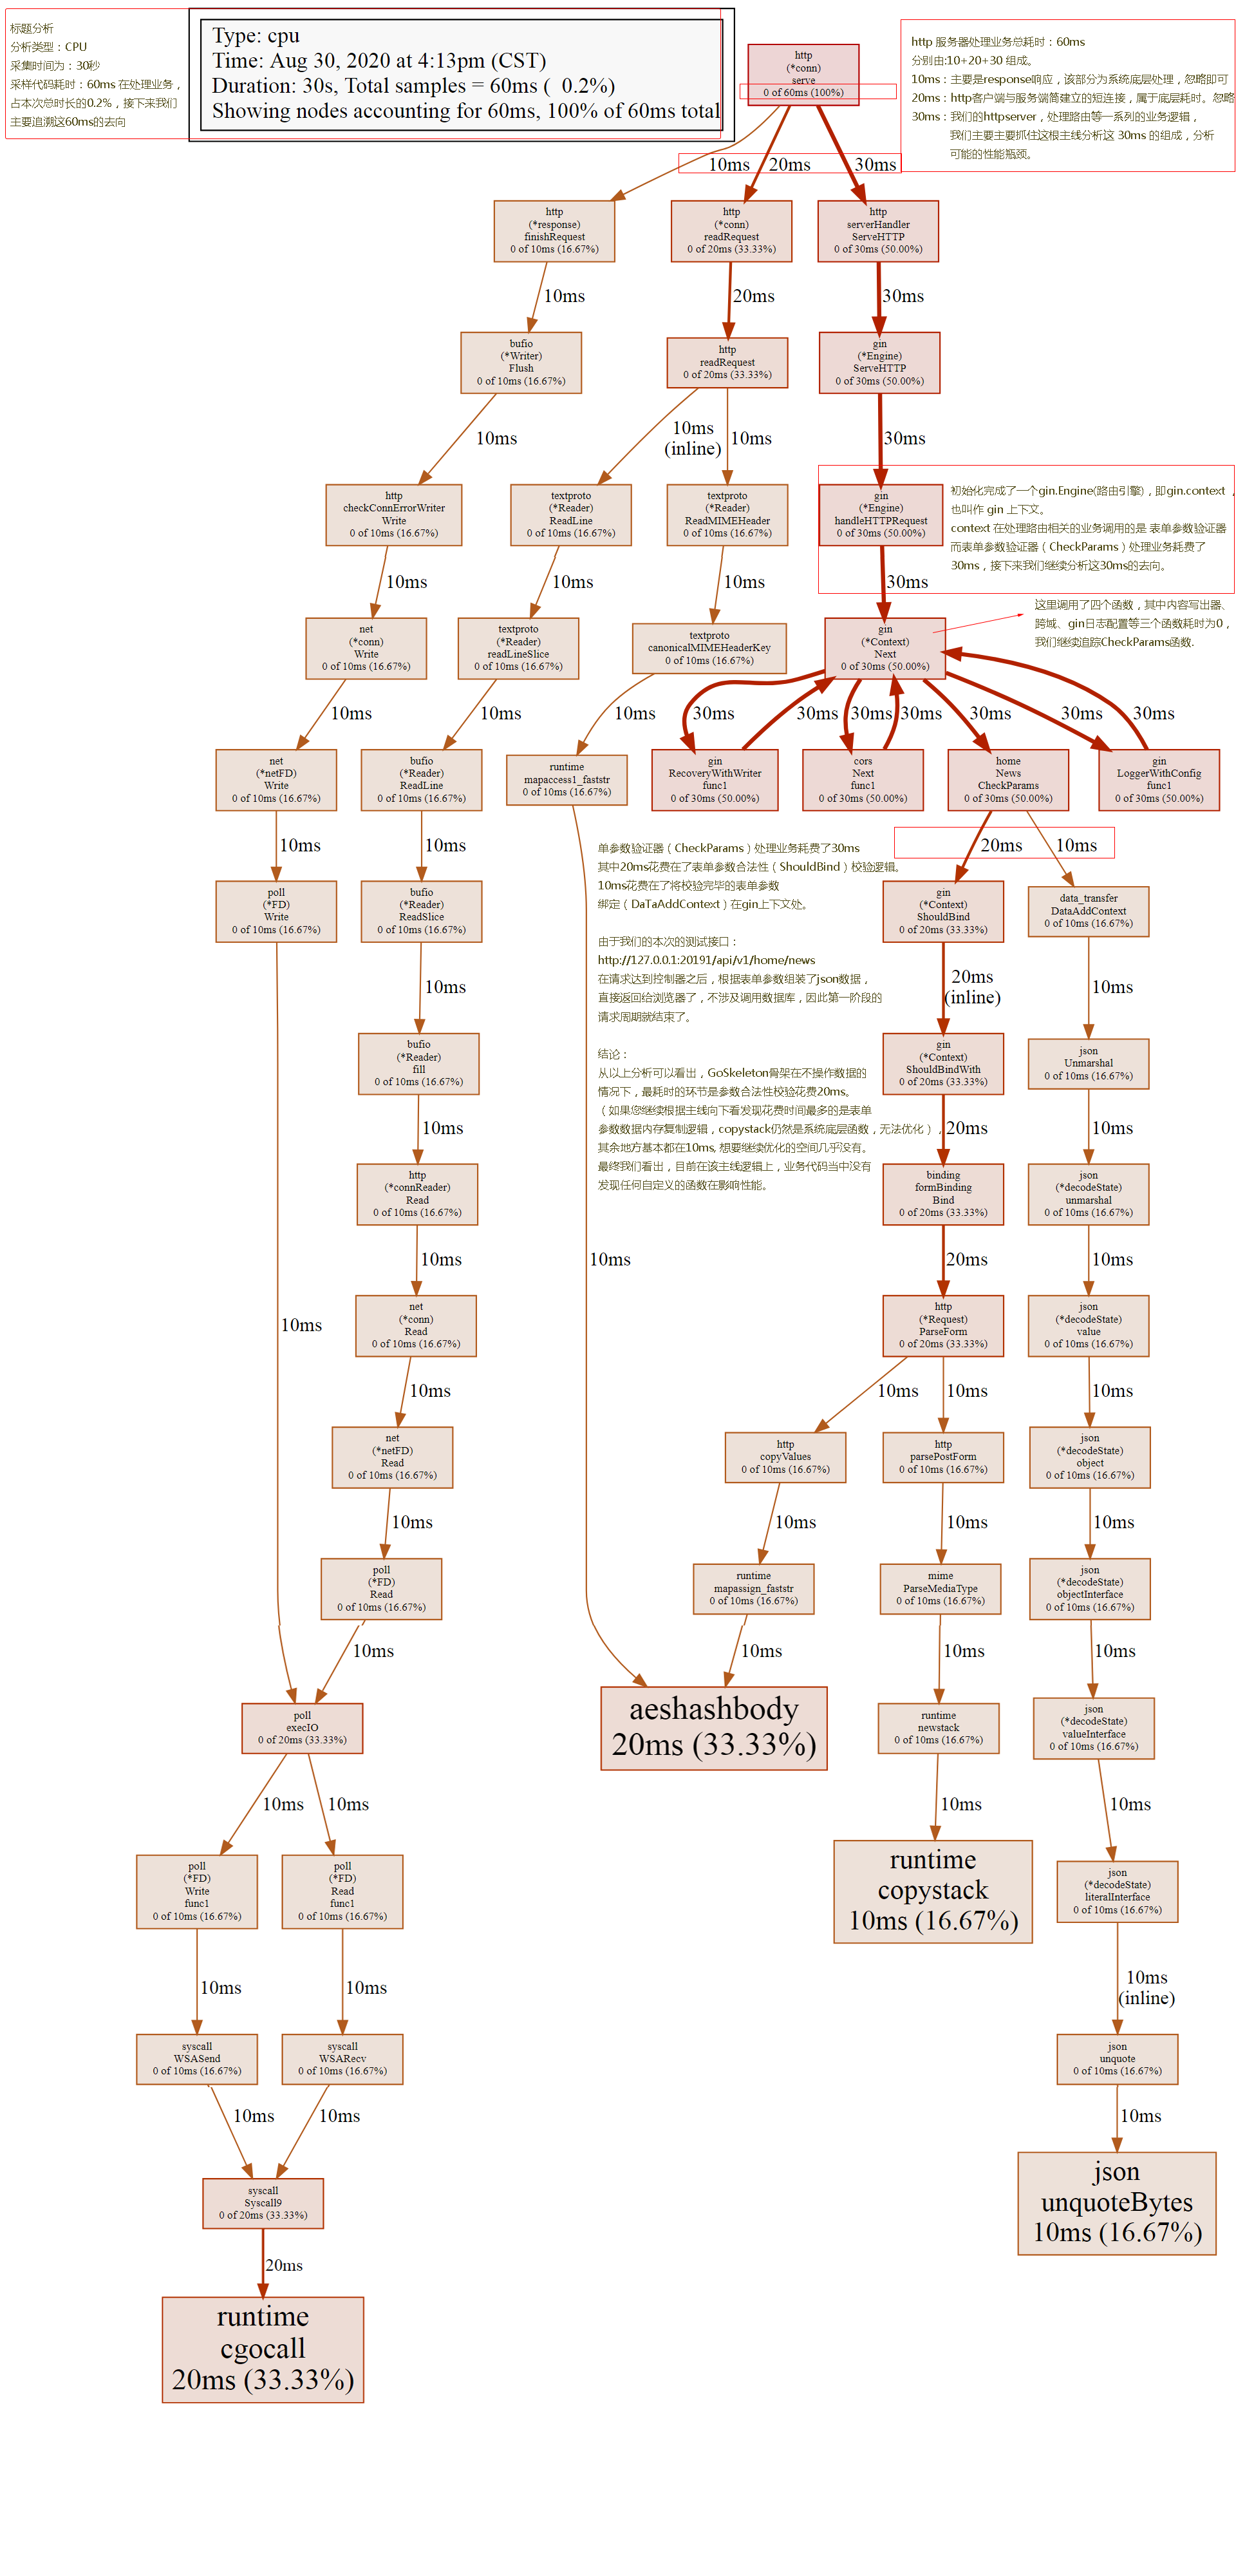
> 最后会生成`profile`文件供下载,将其拷贝到项目中,并进行分析报告
### 解析分析报告
~~~
go tool pprof profile
~~~
> 执行上面的代码会进入交互界面,输入`top3`来查看程序中占用CPU前3位的函数
~~~
top3
~~~
> 其中:
* flat:当前函数占用CPU的耗时
* flat::当前函数占用CPU的耗时百分比
* sun%:函数占用CPU的耗时累计百分比
* cum:当前函数加上调用当前函数的函数占用CPU的总耗时
* cum%:当前函数加上调用当前函数的函数占用CPU的总耗时百分比
* 最后一列:函数名称
> 我们还可以使用`list命令`查看具体的函数分析,例如执行`list logicCode`查看我们编写的函数的详细分析
~~~
list logicCode
~~~
### 图形化分析报告
> 需要安装`graphviz`工具
> 下载地址:https://graphviz.org/download/,linux安装使用 `yum install graphviz`
~~~
go tool pprof --pdf profile
~~~

> 参考文章:https://www.liwenzhou.com/posts/Go/performance_optimisation/
- 基础知识
- 开发环境
- 包名规则
- 包初始化 (init)
- 基础数据类型
- 基础类型转换
- 格式化输出
- go指针
- 流程控制语句
- 函数定义
- 匿名函数
- 数组和切片
- map集合
- 结构体
- Interface接口
- 日期处理
- 数学计算
- 正则表达式
- 协程 (并发处理)
- channel
- waitgroup
- mutex (锁机制)
- websocket
- protobuf
- Redis
- 错误处理
- 打包程序
- NSQ消息队列
- 单元测试
- beego
- 安装入门
- Gin
- 快速入门
- 路由与控制器
- 处理请求参数
- 表单验证
- 处理响应结果
- 渲染HTML模版
- 访问静态文件
- Gin中间件
- Cookie处理
- Session处理
- Gin上传文件
- swagger
- pprof性能测试
- GORM
- 入门教程
- 模型定义
- 数据库连接
- 插入数据
- 查询数据
- 更新数据
- 删除数据
- 事务处理
- 关联查询
- 属于 (BELONG TO)
- 一对一 (Has One)
- 一对多 (Has Many)
- 多对多 (Many to Many)
- 预加载 (Preloading)
- 错误处理
- 第三方常用插件
- viper 读取配置文件
- zap 高性能日志
- Nginx代理配置
- Goland 快捷键
